Blog

  • zink

    zink! – risc0 + ink!

    A demo project prepared for the ParisDot talk (“Zero-Knowledge Proofs using ink!”) – recording.

    The repo contains

    Instructions

    1. Compile the node and run it in the background (or separate shell session)

    cargo build -r
    target/release/zink-node --dev
    
    1. Go to the prover and run the proving locally
    cargo run
    
    1. Copy paste the image ID outputted
    2. Go to the ink! project and compile it (make sure you have cargo-contract installed, instructions)
    cargo contract build --release
    
    1. Instantiate the contract with the IMAGE ID, generated earlier
    cargo contract instantiate --suri //Alice --args "<IMAGE_ID>"
    1. Go back to to the prover and run the it again with the contract address as an arg to generate the proof and submit it a transaction to the node with it
    cargo run -- --contract-address <address>
    
    1. (Optional) if you want to verify the result. Go to the ink! project
    cargo contract call --suri //Alice --message "get_status" --contract <contract address>
    

    The rest of the substrate docs

    Getting Started

    Depending on your operating system and Rust version, there might be additional packages required to compile this template.
    Check the installation instructions for your platform for the most common dependencies.
    Alternatively, you can use one of the alternative installation options.

    Build

    Use the following command to build the node without launching it:

    cargo build --release

    Embedded Docs

    After you build the project, you can use the following command to explore its parameters and subcommands:

    ./target/release/node-template -h

    You can generate and view the Rust Docs for this template with this command:

    cargo +nightly doc --open

    Single-Node Development Chain

    The following command starts a single-node development chain that doesn’t persist state:

    ./target/release/node-template --dev

    To purge the development chain’s state, run the following command:

    ./target/release/node-template purge-chain --dev

    To start the development chain with detailed logging, run the following command:

    RUST_BACKTRACE=1 ./target/release/node-template -ldebug --dev

    Development chains:

    • Maintain state in a tmp folder while the node is running.
    • Use the Alice and Bob accounts as default validator authorities.
    • Use the Alice account as the default sudo account.
    • Are preconfigured with a genesis state (/node/src/chain_spec.rs) that includes several prefunded development accounts.

    To persist chain state between runs, specify a base path by running a command similar to the following:

    // Create a folder to use as the db base path
    $ mkdir my-chain-state
    
    // Use of that folder to store the chain state
    $ ./target/release/node-template --dev --base-path ./my-chain-state/
    
    // Check the folder structure created inside the base path after running the chain
    $ ls ./my-chain-state
    chains
    $ ls ./my-chain-state/chains/
    dev
    $ ls ./my-chain-state/chains/dev
    db keystore network

    Connect with Polkadot-JS Apps Front-End

    After you start the node template locally, you can interact with it using the hosted version of the Polkadot/Substrate Portal front-end by connecting to the local node endpoint.
    A hosted version is also available on IPFS (redirect) here or IPNS (direct) here.
    You can also find the source code and instructions for hosting your own instance on the polkadot-js/apps repository.

    Multi-Node Local Testnet

    If you want to see the multi-node consensus algorithm in action, see Simulate a network.

    Template Structure

    A Substrate project such as this consists of a number of components that are spread across a few directories.

    Node

    A blockchain node is an application that allows users to participate in a blockchain network.
    Substrate-based blockchain nodes expose a number of capabilities:

    • Networking: Substrate nodes use the libp2p networking stack to allow the
      nodes in the network to communicate with one another.
    • Consensus: Blockchains must have a way to come to consensus on the state of the network.
      Substrate makes it possible to supply custom consensus engines and also ships with several consensus mechanisms that have been built on top of Web3 Foundation research.
    • RPC Server: A remote procedure call (RPC) server is used to interact with Substrate nodes.

    There are several files in the node directory.
    Take special note of the following:

    • chain_spec.rs: A chain specification is a source code file that defines a Substrate chain’s initial (genesis) state.
      Chain specifications are useful for development and testing, and critical when architecting the launch of a production chain.
      Take note of the development_config and testnet_genesis functions.
      These functions are used to define the genesis state for the local development chain configuration.
      These functions identify some well-known accounts and use them to configure the blockchain’s initial state.
    • service.rs: This file defines the node implementation.
      Take note of the libraries that this file imports and the names of the functions it invokes.
      In particular, there are references to consensus-related topics, such as the block finalization and forks and other consensus mechanisms such as Aura for block authoring and GRANDPA for finality.

    Runtime

    In Substrate, the terms “runtime” and “state transition function” are analogous.
    Both terms refer to the core logic of the blockchain that is responsible for validating blocks and executing the state changes they define.
    The Substrate project in this repository uses FRAME to construct a blockchain runtime.
    FRAME allows runtime developers to declare domain-specific logic in modules called “pallets”.
    At the heart of FRAME is a helpful macro language that makes it easy to create pallets and flexibly compose them to create blockchains that can address a variety of needs.

    Review the FRAME runtime implementation included in this template and note the following:

    • This file configures several pallets to include in the runtime.
      Each pallet configuration is defined by a code block that begins with impl $PALLET_NAME::Config for Runtime.
    • The pallets are composed into a single runtime by way of the construct_runtime! macro, which is part of the core FRAME Support system library.

    Pallets

    The runtime in this project is constructed using many FRAME pallets that ship with the core Substrate repository and a template pallet that is defined in the pallets directory.

    A FRAME pallet is compromised of a number of blockchain primitives:

    • Storage: FRAME defines a rich set of powerful storage abstractions that makes it easy to use Substrate’s efficient key-value database to manage the evolving state of a blockchain.
    • Dispatchables: FRAME pallets define special types of functions that can be invoked (dispatched) from outside of the runtime in order to update its state.
    • Events: Substrate uses events and errors to notify users of important changes in the runtime.
    • Errors: When a dispatchable fails, it returns an error.
    • Config: The Config configuration interface is used to define the types and parameters upon which a FRAME pallet depends.

    Alternative Installations

    Instead of installing dependencies and building this source directly, consider the following alternatives.

    CI

    Binary

    Check the CI release workflow to see how the binary is built on CI.
    You can modify the compilation targets depending on your needs.

    Allow GitHub actions in your forked repository to build the binary for you.

    Push a tag. For example, v0.1.1. Based on Semantic Versioning, the supported tag format is v?MAJOR.MINOR.PATCH(-PRERELEASE)?(+BUILD_METADATA)? (the leading “v”, pre-release version, and build metadata are optional and the optional prefix is also supported).

    After the pipeline is finished, you can download the binary from the releases page.

    Container

    Check the CI release workflow to see how the Docker image is built on CI.

    Add your DOCKERHUB_USERNAME and DOCKERHUB_TOKEN secrets or other organization settings to your forked repository.
    Change the DOCKER_REPO variable in the workflow to [your DockerHub registry name]/[image name].

    Push a tag.

    After the image is built and pushed, you can pull it with docker pull <DOCKER_REPO>:<tag>.

    Nix

    Install nix, and optionally direnv and lorri for a fully plug-and-play experience for setting up the development environment.
    To get all the correct dependencies, activate direnv direnv allow and lorri lorri shell.

    Docker

    Please follow the Substrate Docker instructions here to build the Docker container with the Substrate Node Template binary.

    Visit original content creator repository
    https://github.com/SkymanOne/zink

  • feature-toggles-visual-demo

    Feature Toggles Visual Demo

    Build GitHub Pages

    Feature Toggles are a powerful tool for development teams (including business persons) to deliver functionality quickly and safely, by decoupling code deployment from feature deployment.

    Feature Toggles decouple code deployment from feature deployment; thus, enabling true Continuous Delivery.

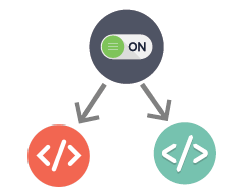
    In simple terms, a feature toggle is an on-off switch for some part of the software system, which can be turned on or off after the deployment.

    abstract-toggle.png

    This mechanism enables teams to decide when a certain feature goes live, have a kill-switch when something isn’t working as intended, not having unfinished code block deployment, do calender-driven launches, do A/B testing, and much more.

    Further, this decoupling of code and feature deployment alleviates pressure from developers to finish a feature, making feature freezes and long-running feature-branches unnecessary, enables on-demand releases, and simplifies the workflow (cf. trunk-based development).

    You can find more information about feature toggles in the subsequent sections and provided links.

    💻 This Demo

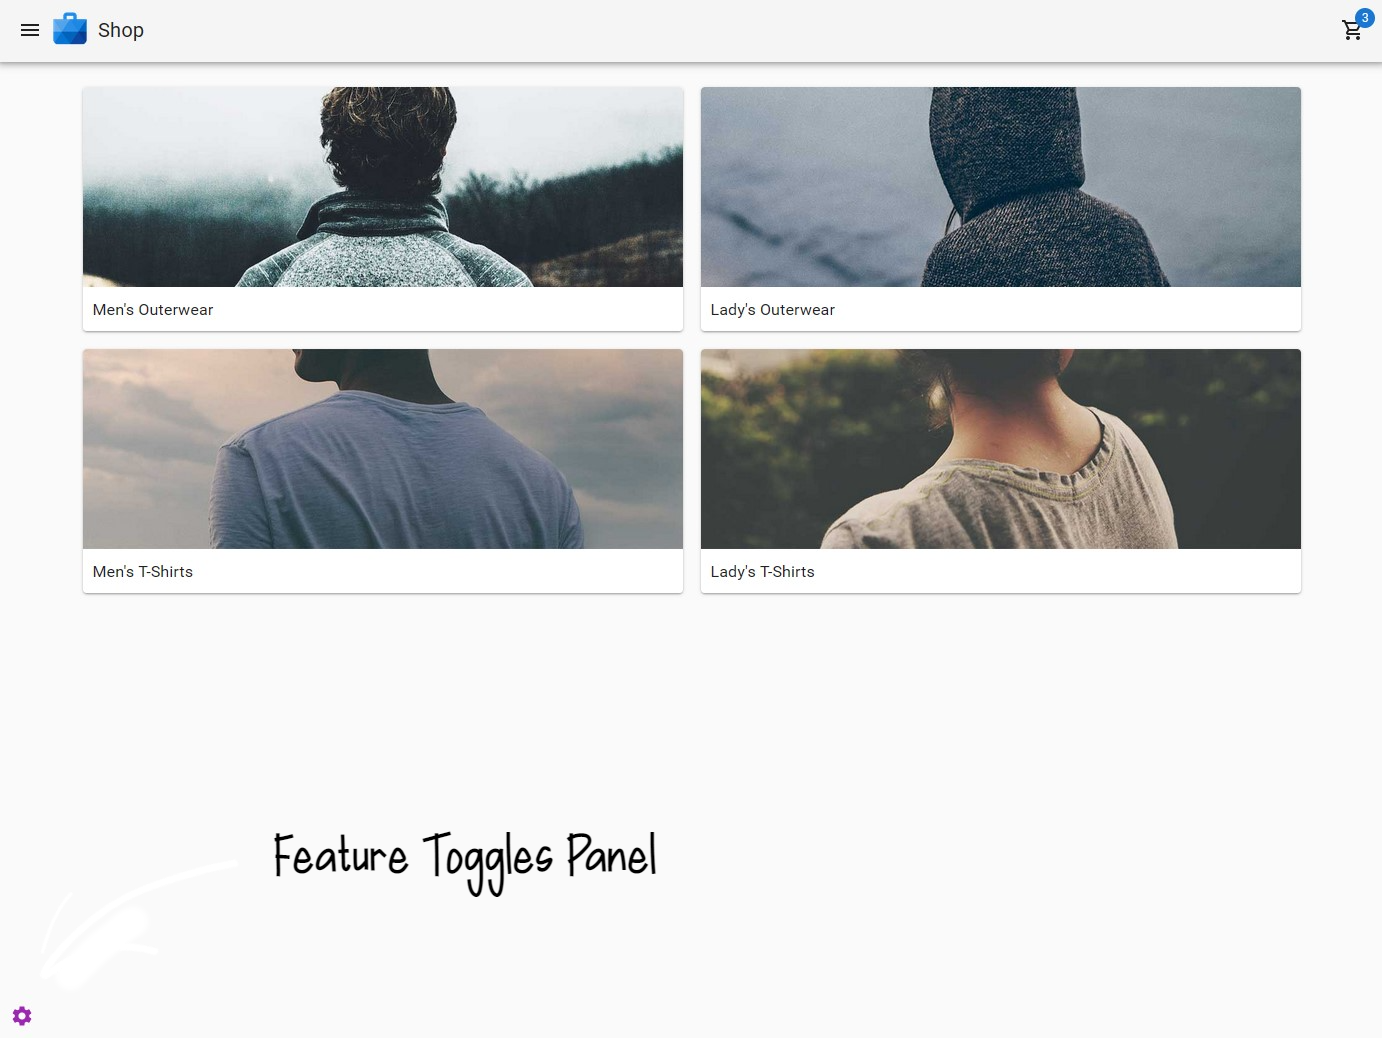
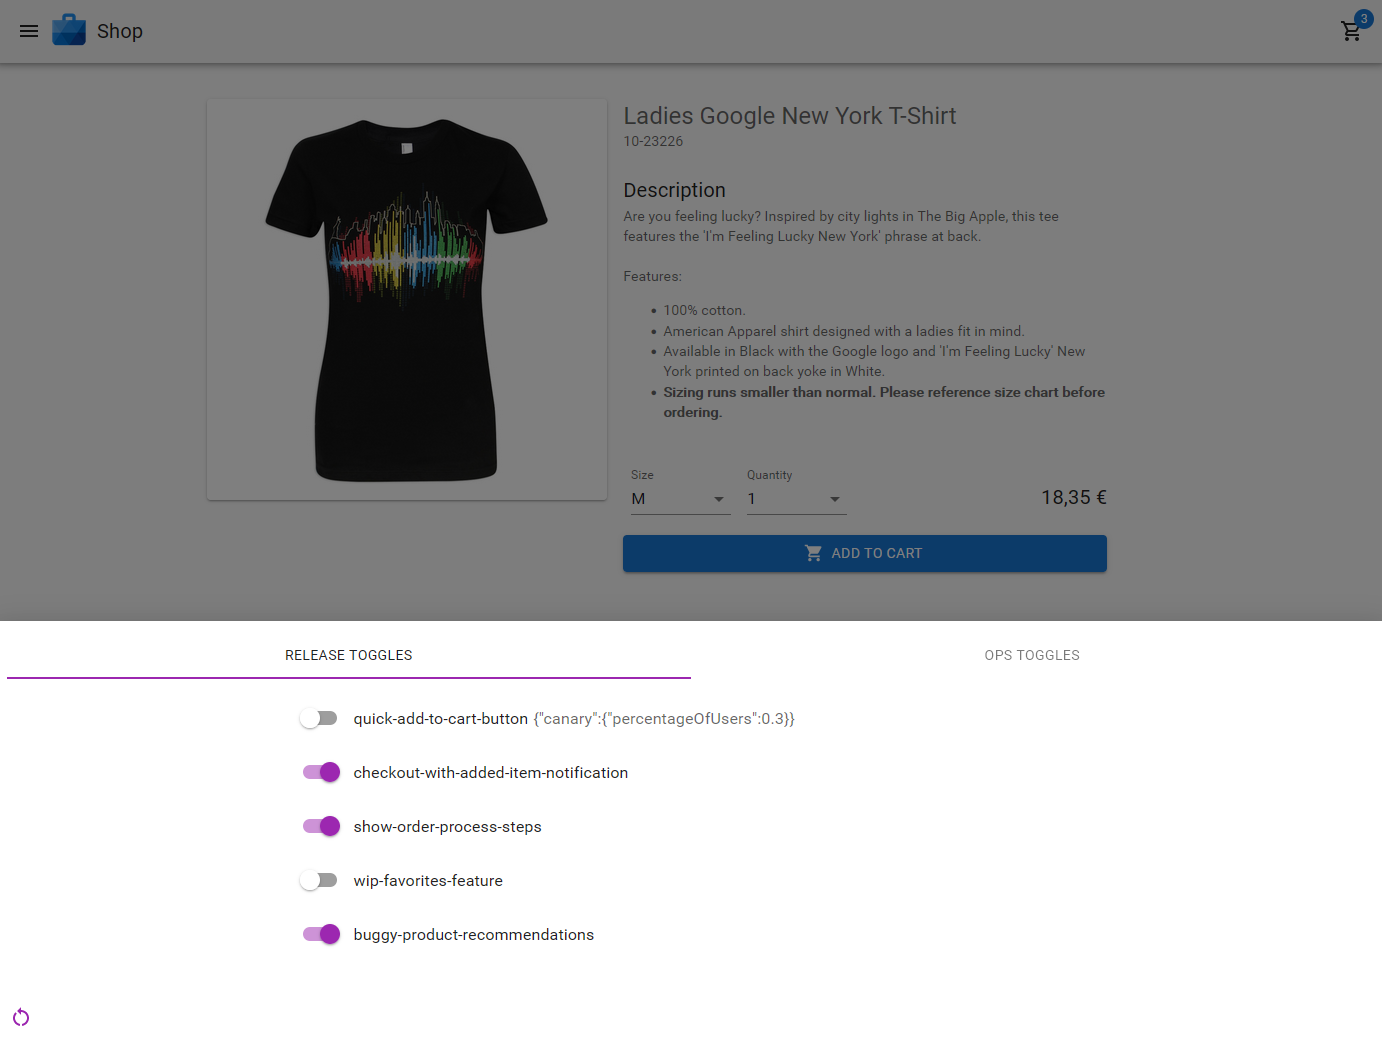
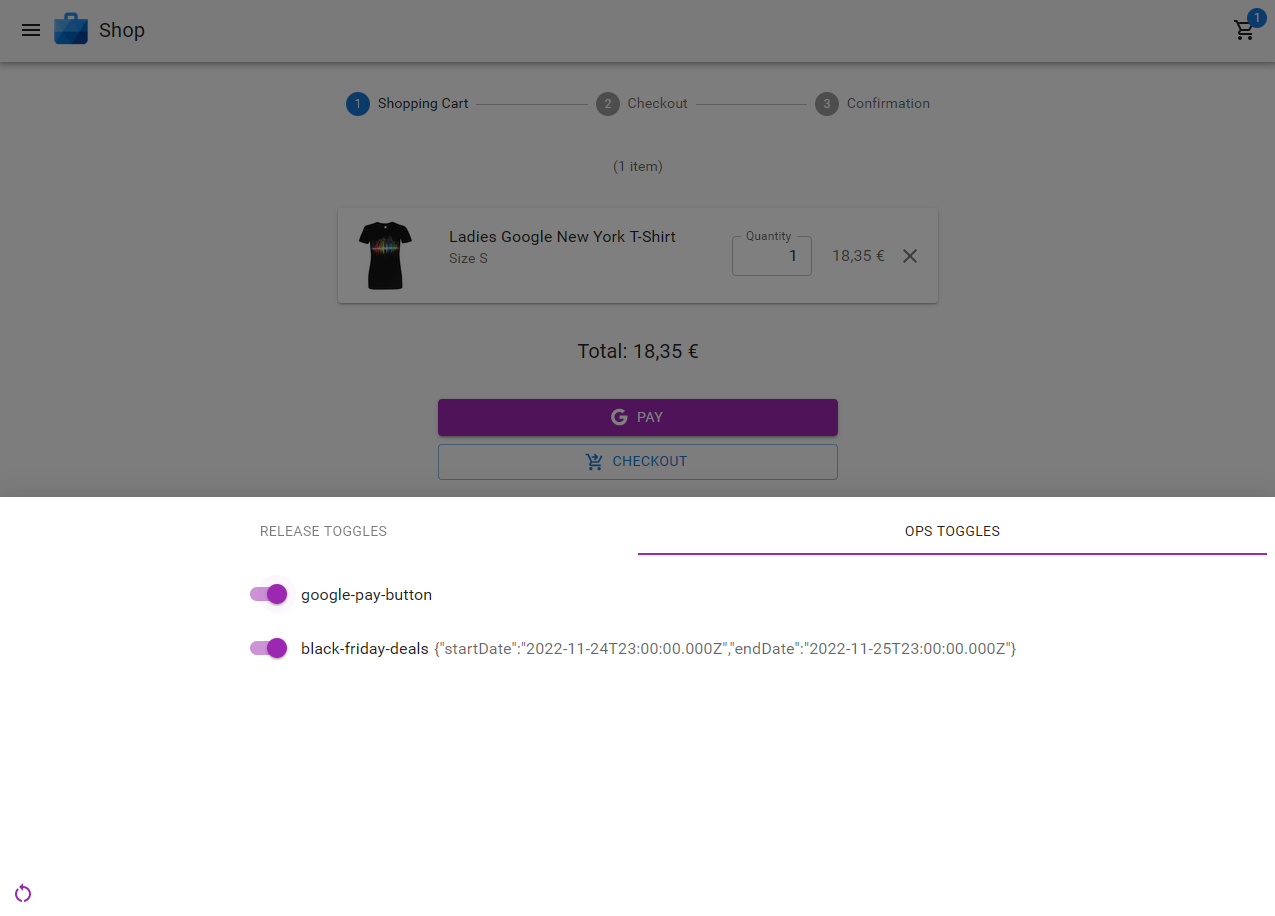
    This demo is intended as a presentation for non-developers to visualize how features toggles help development teams decouple code deployment from feature deployment.

    You can try the demo here.

    shop-start.png shop-release-toggles.png shop-ops-toggles.png

    Run Locally

    git clone https://github.com/andrej-dyck/feature-toggles-visual-demo.git \
     && cd feature-toggles-visual-demo \
     && yarn install \
     && yarn build \
     && yarn preview
    

    Then open http://localhost:8080/feature-toggles-visual-demo/

    🎓 For Developers and Inquiring Minds

    Feature Toggles are nothing new and are used by small and large software systems alike. They allow development teams to work on features and integrate their code with confidence.

    With feature toggles, changes can be tested and approved independent of code deployment, they can be rolled out incrementally (cf. canary release), or, most importantly, easily reverted by switching off the toggle.

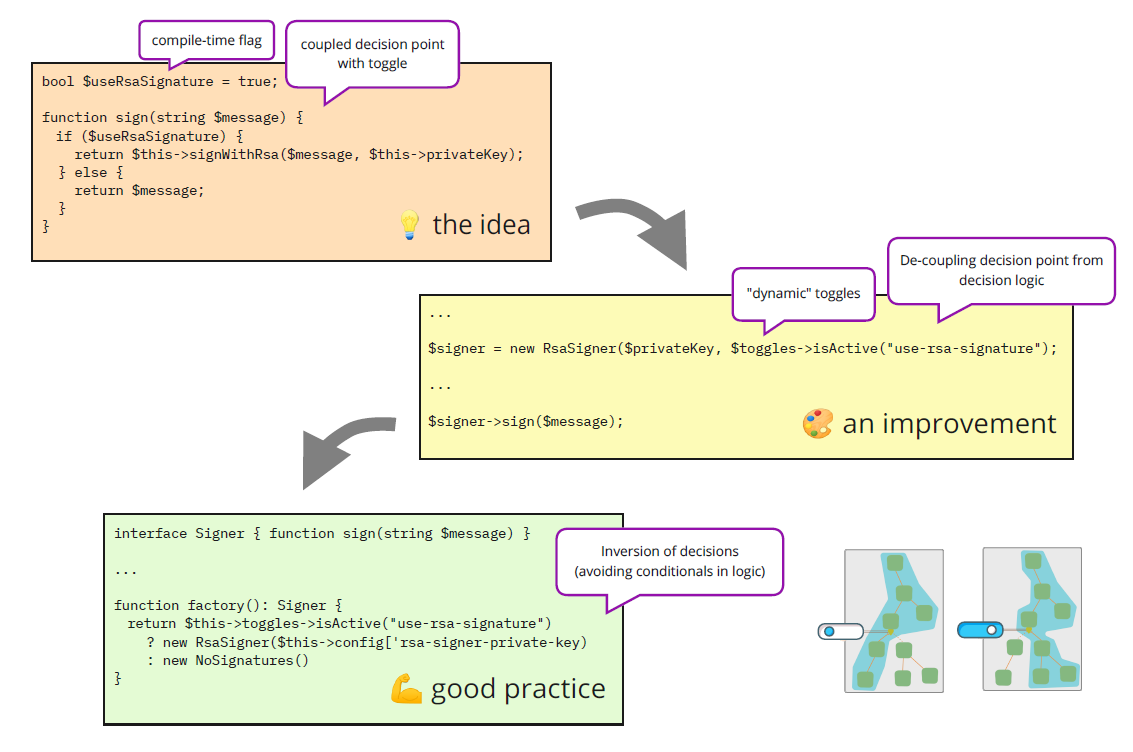
    Basic Idea

    The basic idea of a feature toggle is an if-else that can be configured at runtime. It can be as simple as hiding a UI element to changing behavior or performance.

    Basic Idea

    While compile-time flags are sometimes good enough, it is a good practice when toggles can be switch on/off the toggles without the need to re-deploy code.

    Further, to improve code design and minimize complexity by avoiding conditionals in logic, toggles should create dependency graphs as close to the client as possible.

    Feature Toggles vs Feature Flags

    In most literature, feature toggles and feature flags are synonyms (along with feature switch, feature gate, feature flipper).

    For me, a flag is the named on-off switch and the toggle is the corresponding technical decision point.

    Types of Feature Toggles

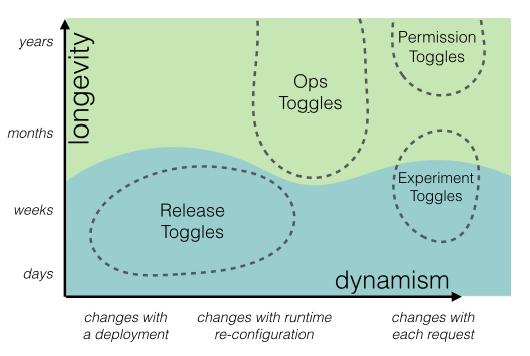
    There are several types of feature toggles. Martin Fowler’s article describes four types of toggles:

    Types of Toggles

    For developers, the most used ones are release toggles. This is why, feature toggles and release toggles are often used as synonyms.

    In this demo, I only used release and ops toggles, because I would argue that experiment and permission toggles can be seen as a subset of release and ops toggles, respectively.

    Caution!

    While feature toggles have many benefits, they introduce complexity to the code base and require a discipline to manage the overhead and clean-up later (that way, toggles are similar to technical debt).

    In other words, the usage of feature toggles has some costs, and thus, we need to consider the cost-benefit ratio on a case-by-case basis.

    For example, changing the style of a UI element could be considered by many applications a low risk scenario. So, a feature toggle might be too costly and a fix could be released with the next build.

    Other times, we can work on a feature without affecting the rest of the application. Further, we can reduce visibility and/or user input of new features; e.g., by providing a view without a menu item or showing data as readonly.

    Another (rather extreme) example, is the change or upgrade of an important dependency (e.g., framework). Here, we probably have technical difficulties to build a project with two versions of the same dependency. However, we might be able to deploy and run two copies of the application (with the old and new dependency version) and move the toggle into a load balancer or star script.

    Good Practice

    There are many great articles with good practices for feature toggles. Here are two that are a good starting point: Feature Toggles Best Practices and Managing Feature Toggles in Teams.

    To contribute to these lists, here are some of my lessons-learned.

    Flags

    • Feature flags should be visible to business people
    • Feature flags should be switchable without code re-deployment
    • Use some flag naming convention; be expressive and precise
    • Separate flag types in code (this is helpful when maintaining the code)
    • Use typed flag names; e.g., enums or union types (so the compiler can help to prevent typos and indicate unused flags)
    • Log changes to flags

    Toggles

    • Use a flag only in one place, i.e., for one toggle (consider to introduce an additional flag if needed)
    • Keep the scope of the toggle as small as possible
    • Prefer to place the toggle as close to the “entry point” as possible
    • Annotated obsolete code (the code that will be removed) with the introduction of the toggle (this makes the removal a straight-forward task)
    • Toggles should be off by default

    Organization

    • Include toggle planning in the design phase
    • Plan to remove the toggle (and obsolete code) as soon as you introduce it
    • Remove toggles as soon as possible

    Workflow “New Feature”

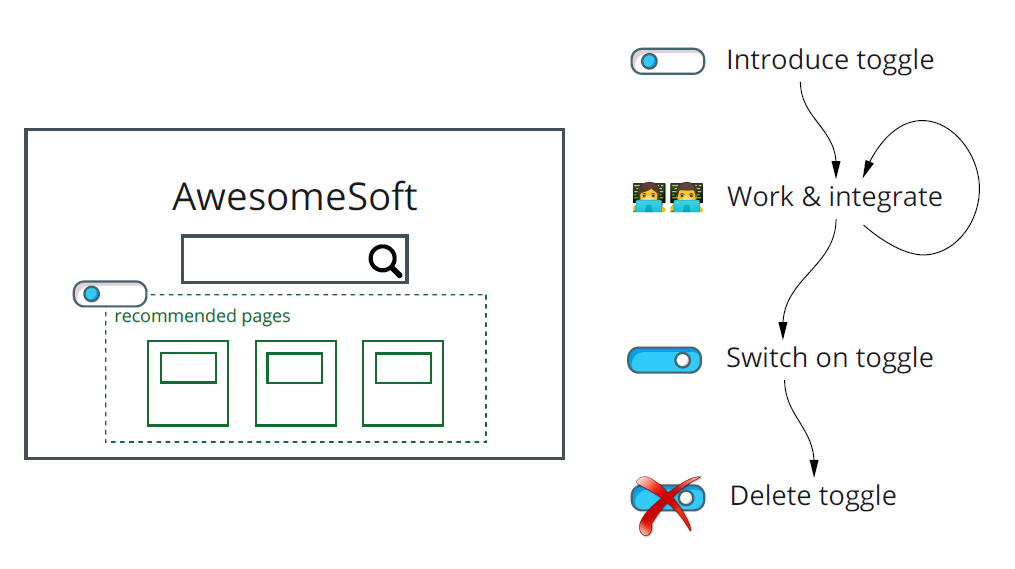
    Here’s an example workflow for a new feature. Note that new features can often simply be hidden from the user. However, we need to be careful that there are no hidden interdependencies.

    Workflow New Feature

    Workflow “Changes”

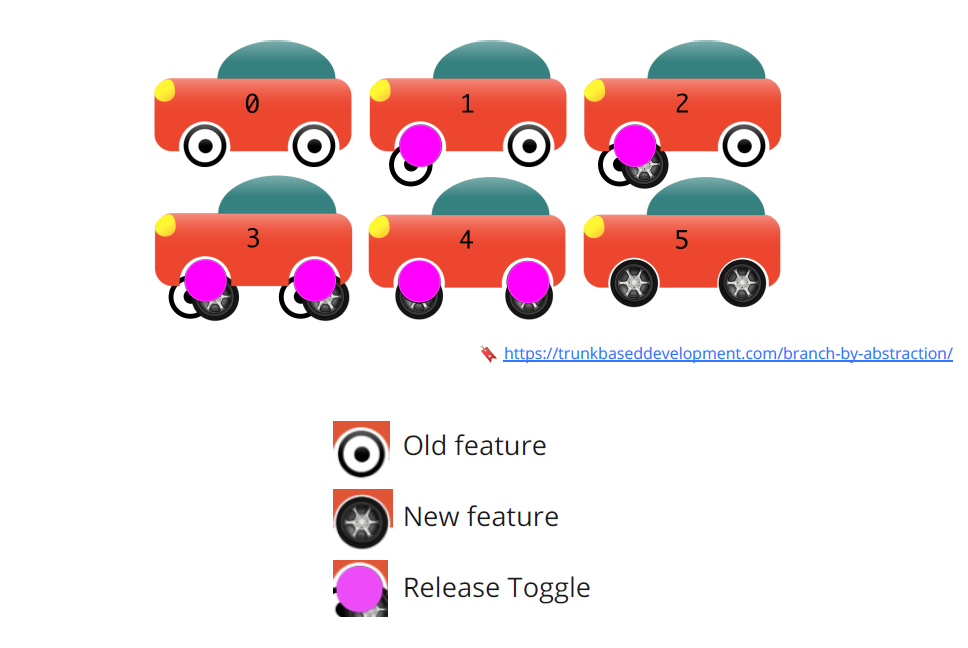
    Here’s an example workflow for a behavior change or replacement. In this case, we need to plan ahead, and two versions will exist simultaneously for a while. To this end, the technique branch by abstraction can be combined with feature toggles.

    Workflow Changes

    Checklist

    • Is a toggle needed? Introduce toggle first
    • Work on feature
    • Document toggle
    • Switch on for acceptance tests
    • Switch on for production
    • Is everything fine? Plan clean-up
    • Remove toggle and obsolete code

    Credits

    While I referenced some articles on the discussed topics, there are many, many more. If you want two great books to start with, I would recommend Release It! by Nygard and Code That Fits in Your Head by Seemann.

    This example is based on the design Google Pay store example and is using its product-catalog. The code was mostly written from scratch with some copy&paste.

    Visit original content creator repository https://github.com/andrej-dyck/feature-toggles-visual-demo
  • This Add-In gives the user a custom favorites ribbon. Key distinctive attributes include dedicated buttons for changing the visibility/sort order of sheets, copying visible cells, Excel’s camera feature, Snipping Tool, Problem Steps Recorder (PSR) and Windows Calculator. It is written in 3 different versions as a VSTO Add-In in C# and VB.NET as well as a VBA Add-In. The most complete version is C#.

    🆕 I’m currently working on the Web Add-In in JavaScript.

    Join the chat at https://gitter.im/MicrosoftExcelFavorites/Lobby License: MIT Latest Release Github commits (since latest release) GitHub issues


    Table of Contents


    Install

    Instructions for installation of VBA and VSTO versions.

    VBA

    How to install the VBA version

    1. Download the VBA Add-In file download VBA.
    2. Copy the file to the XLSTART folder on your computer. %AppData%\Microsoft\Excel\XLSTART\
    3. Close all open instances of Excel and then launch Excel. The new ribbon should appear.

    VSTO

    How to install the VSTO version

    1. Download AnthonyDuguid.pfx And Install At Root Level download Key
    2. Download and run the setup.exe file. download VSTO

    Dependencies

    Software Dependency Project
    Microsoft Visual Studio Solution VSTO
    Microsoft Office Developer Tools Solution VSTO
    Microsoft Excel Project VBA, VSTO
    Visual Basic for Applications Code VBA
    Extensible Markup Language (XML) Ribbon VBA, VSTO
    Snagit Read Me VBA, VSTO
    Badges (Library, Custom, Star/Fork) Read Me VBA, VSTO

    Glossary of Terms

    Term Meaning
    COM Component Object Model (COM) is a binary-interface standard for software components introduced by Microsoft in 1993. It is used to enable inter-process communication and dynamic object creation in a large range of programming languages. COM is the basis for several other Microsoft technologies and frameworks, including OLE, OLE Automation, ActiveX, COM+, DCOM, the Windows shell, DirectX, UMDF and Windows Runtime.
    VBA Visual Basic for Applications (VBA) is an implementation of Microsoft’s event-driven programming language Visual Basic 6 and uses the Visual Basic Runtime Library. However, VBA code normally can only run within a host application, rather than as a standalone program. VBA can, however, control one application from another using OLE Automation. VBA can use, but not create, ActiveX/COM DLLs, and later versions add support for class modules.
    VSTO Visual Studio Tools for Office (VSTO) is a set of development tools available in the form of a Visual Studio add-in (project templates) and a runtime that allows Microsoft Office 2003 and later versions of Office applications to host the .NET Framework Common Language Runtime (CLR) to expose their functionality via .NET.
    XML Extensible Markup Language (XML) is a markup language that defines a set of rules for encoding documents in a format that is both human-readable and machine-readable.The design goals of XML emphasize simplicity, generality, and usability across the Internet. It is a textual data format with strong support via Unicode for different human languages. Although the design of XML focuses on documents, the language is widely used for the representation of arbitrary data structures such as those used in web services.

    Functionality

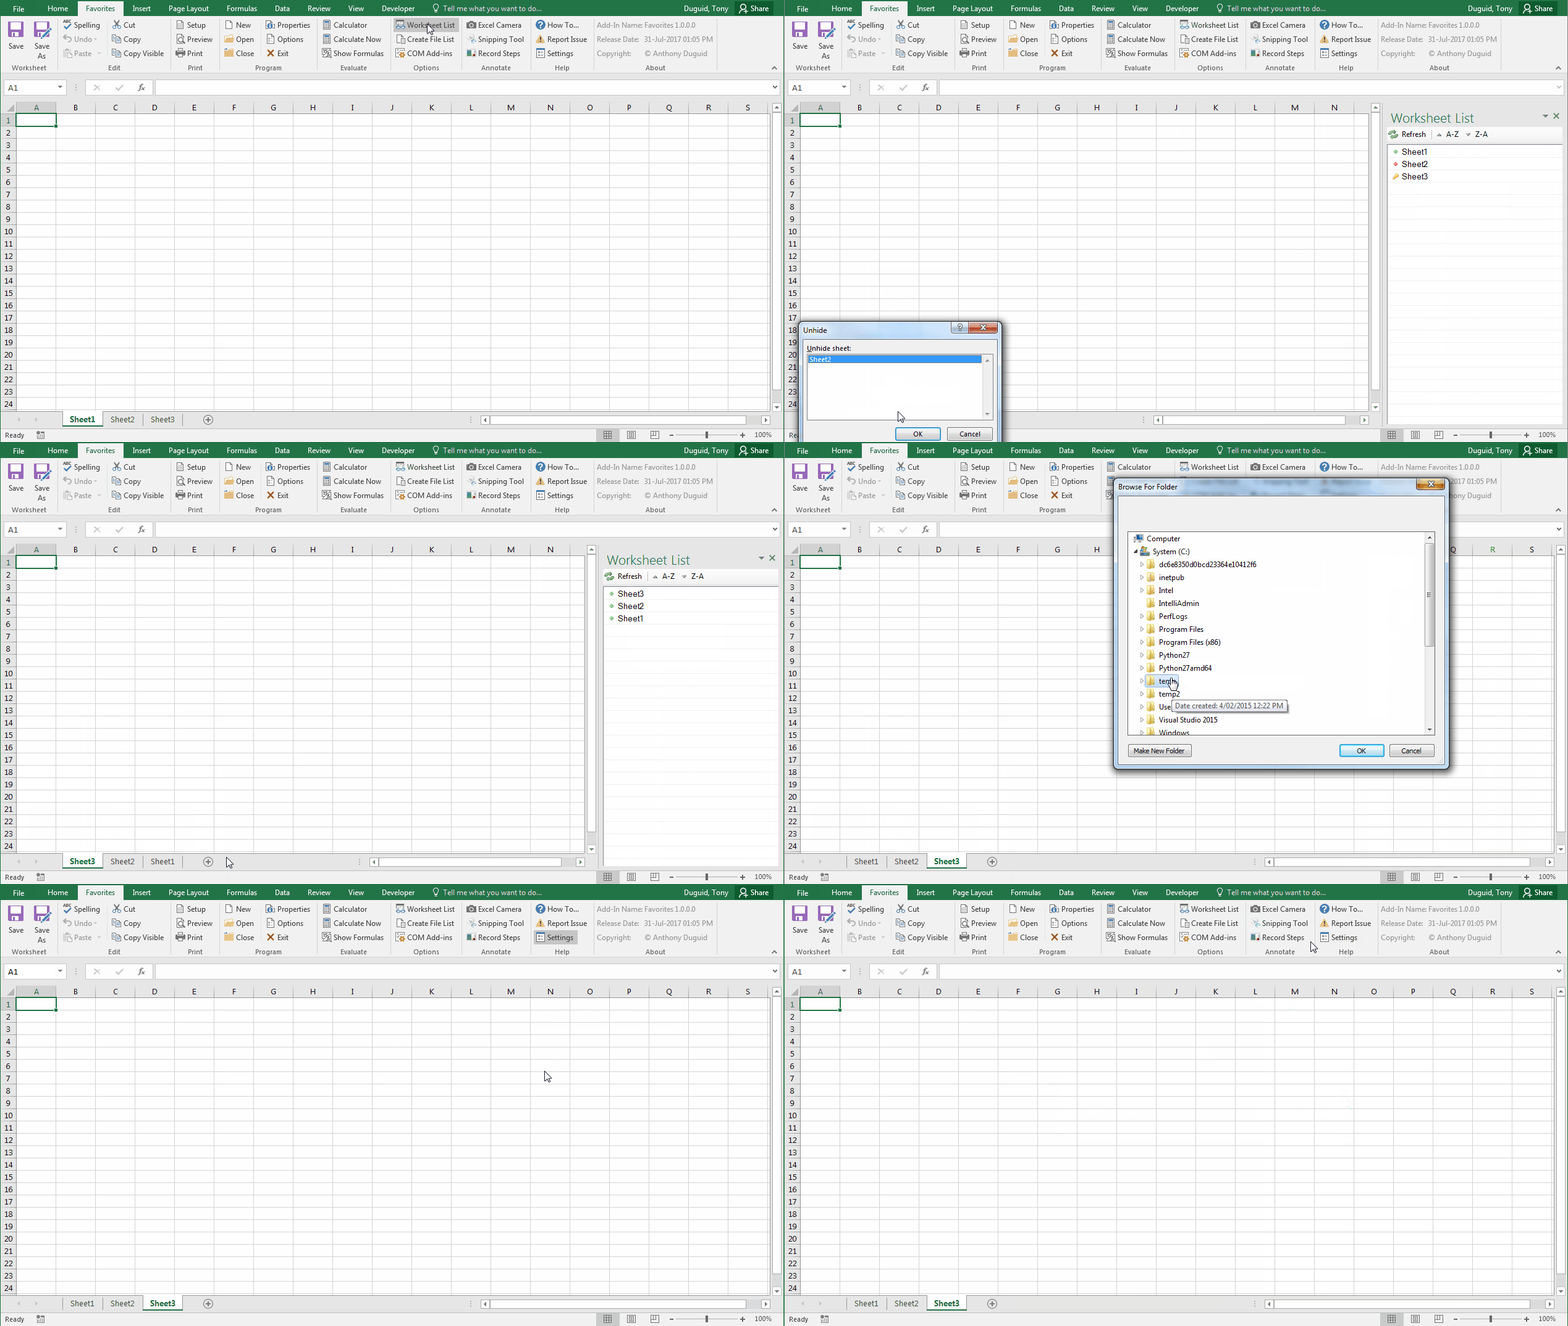
    This Excel ribbon named “Favorites” is inserted after the “Home” tab when Excel opens.

    Worksheet (Group)

    Save (Button)

    • Save (Ctrl + S)

    Save As (Button)

    • Save As (F12)

    Edit (Group)

    Undo (Button)

    • Undo (Ctrl + Z)

    Copy (Button)

    • Copy (Ctrl + C)

    Cut (Button)

    • Cut (Ctrl + X)

    Paste (Button)

    • Paste (Ctrl + V)

    Spelling (Button)

    • Spelling (F7)

    Print (Group)

    Setup (Button)

    • Show the Sheet tab of the page setup dialog box

    Preview (Button)

    • Preview (Ctrl + F2)

    Print (Button)

    • Print (Ctrl + P)

    Program (Group)

    New (Button)

    • New file

    Open (Button)

    • Open (Ctrl + O)

    Close (Button)

    • Close file

    Properties (Button)

    • Open the properties of the file

    Options (Button)

    • Open the options dialog box

    Exit (Button)

    • Exit the application

    Evaluate (Group)

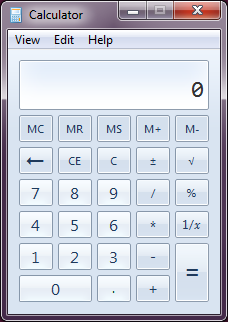
    Windows Calculator (Button)

    calculator

    • The Windows Calculator runs in standard mode, which resembles a four-function calculator. More advanced functions are available in scientific mode, including logarithms, numerical base conversions, some logical operators, operator precedence, radian, degree and gradians support as well as simple single-variable statistical functions

    Calculate Now (Button)

    • Force the Calculation. Even if the Calculation option is set for Manual, you can force a calculation.

    Annotate (Group)

    Excel Camera(Button)

    • The camera tool allows you to take a snapshot of any selected range of data, table, or graph, and paste it as a linked picture. The pasted snapshot can be formatted and resized using picture tools. They can be copied and pasted into Word and PowerPoint documents as well. The image is automatically refreshed if the data changes.

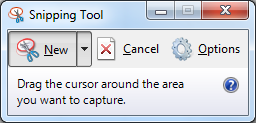
    Snipping Tool (Button)

    snipping_tool

    • Capture all or part of your PC screen, add notes, save the snip, or email it from the Snipping Tool window. You can capture any of the following types of snips:
      • Free-form snip. Draw a free-form shape around an object.
      • Rectangular snip. Drag the cursor around an object to form a rectangle.
      • Window snip. Select a window, such as a browser window or dialog box, that you want to capture.
      • Full-screen snip. Capture the entire screen.

    Problem Step Recorder (Button)

    psr

    • Steps Recorder (called Problems Steps Recorder in Windows 7), is a program that helps you troubleshoot a problem on your device by recording the exact steps you took when the problem occurred. You can then send this record to a support professional to help them diagnose the problem.

    Options (Group)

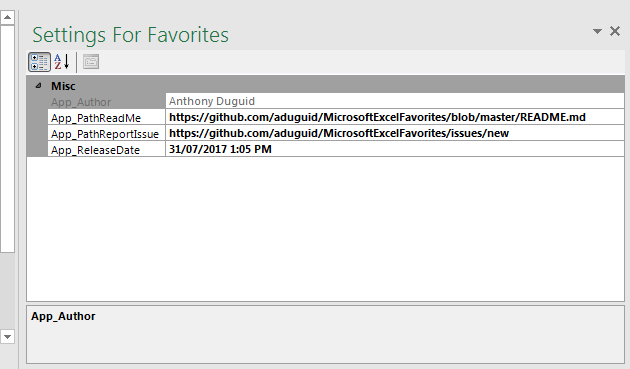
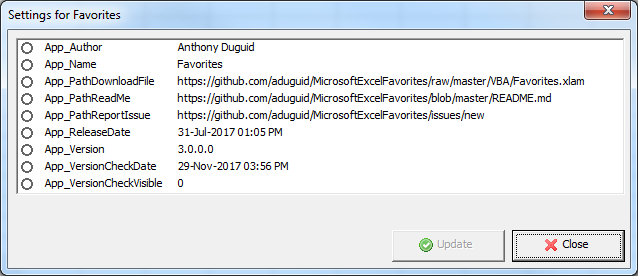
    Add-In Settings (Button)

    VSTO
    • Types of VSTO Settings
      • Application Settings
        • These settings can only be changed in the project and need to be redeployed
        • They will appear disabled in the form
      • User Settings
        • These settings can be changed by the end-user
        • They will appear enabled in the form
    VBA
    • VBA Settings
      • To add a new setting
        ThisWorkbook.CustomDocumentProperties.Add _
        Name:="App_ReleaseDate" _
        , LinkToContent:=False _
        , Type:=msoPropertyTypeDate _
        , Value:="31-Jul-2017 1:05pm"
      • To update a setting
        ThisWorkbook.CustomDocumentProperties.Item("App_ReleaseDate").Value = "31-Jul-2017 1:05pm"
      • To delete a setting
        ThisWorkbook.CustomDocumentProperties.Item("App_ReleaseDate").Delete

    Help (Group)

    How To… (Button)

    • Opens the how to guide in a browser

    Report Issue (Button)

    • Opens the new issue page in a browser

    New Version Is Available (Button)

    • This button is visible if the version of the Add-In is different from the one in the Read Me page. It will download a new version from the site when pressed.

    About (Group)

    about

    Add-in Name (Label)

    • The application name with the version

    Release Date (Label)

    • The release date of the application

    Copyright (Label)

    • The author’s name
    Visit original content creator repository https://github.com/Excel-projects/Excel-Favorites
  • breakout_detection_wraper

    breakout_detection_wraper

    Twitter’s R breakout detection package wraper for python on a docker.
    For more information on the Breakout detection package you can check this article explaining it.

    Make sure to have installed docker on your environment, if you need more information go to DOCKER DOCUMENTATION.
    This script also uses Pipenv for it’s python virtual environment and dependencies, for more information on how to use this go to the pipenv documentation.

    To run this script you need clone this repo and then build and run the docker container as following:

    Based on the Docker build and run Documentation:

    Build the app
    Make sure you are in the repository top. Here’s what ls should show:

    $ ls  
    Dockerfile                README.md  
    Pipfile                   breakout_detection_wraper  
    Pipfile.lock              install_packages.R  
    

    Now run the build command. This creates a Docker image, which we’re going to name using the –tag option. Use -t if you want to use the shorter option.

    $ docker build --tag=boutdetect .

    (NOTICE THAT THERE IS A DOT AT THE END OF THIS COMMAND)

    Where is your built image?
    It’s in your machine’s local Docker image registry
    To show it run the following command:

    $ docker image ls

    REPOSITORY TAG IMAGE ID CREATED
    boutdetect lastest 326387cea398 23 seconds ago

    Now to run the image you need to run the command:
    $ docker run boutdetect

    That’s it!
    Now you should get a result like the following:

    $loc  
    [1]  31  88 750  
      
    $time  
    [1] 1.406  
      
    $pval  
    [1] NA  
    

    To work with R inside Python I used a Wrapper library called RPY2. It is already installed in this docker container but you can install it with:
    pip install rpy2

    To “build” the wrapper first you need to read the R script file of the function you are about to use with the following:

    with open('breakout_detection_wraper/breakout_function.R') as code:  
            rcode = os.linesep.join(code.readlines())  


    Then you need to put it into the wrapper:

    wrapper = SignatureTranslatedAnonymousPackage(rcode, "breakout_function")  


    And finally run the function you just wrapped:

    result = wrapper.Detect(FloatVector(mydata), minsize, method, degree)  


    For more information you can go to the Rpy2 documentation

    Visit original content creator repository
    https://github.com/BentoBox-Project/breakout_detection_wraper