Blog

  • Purview-Custom-Connector-Solution-Accelerator

    page_type languages products
    sample
    python
    bash
    microsoft-purview
    azure-synapse-analytics

    Purview Custom Connector Solution Accelerator Banner

    Purview Custom Connector Solution Accelerator

    Microsoft Purview is a unified data governance service that helps you manage and govern your on-premises, multi-cloud, and software-as-a-service (SaaS) data. Microsoft Purview Data Map provides the foundation for data discovery and effective data governance, however, no solution can support scanning metadata for all existing data sources or lineage for every ETL tool or process that exists today. That is why Purview was built for extensibility using the open Apache Atlas API set. This API set allows customers to develop their own scanning capabilities for data sources or ETL tools which are not yet supported out of the box. This Solution Accelerator is designed to jump start the development process and provide patterns and reusable tooling to help accelerate the creation of Custom Connectors for Microsoft Purview.

    The accelerator includes documentation, resources and examples to inform about the custom connector development process, tools, and APIs. It further works with utilities to make it easier to create a meta-model for your connector (Purview Custom Types Tool) with examples including ETL tool lineage as well as a custom data source. It includes infrastructure / architecture to support scanning of on-prem and complex data sources using Azure Synapse Spark for compute and Synapse pipelines for orchestration.

    Applicability

    There are multiple ways to integrate with Purview. Apache Atlas integration (as demonstrated in this Solution Accelerator) is appropriate for most integrations. For integrations requiring ingestion of a large amount of data into Purview / high scalability, it is recommended to integrate through the Purview Kafka endpoint. This will be demonstrated through an example in a future release of this accelerator.

    The examples provided demonstrate how the design and services can be used to accelerate the creation of custom connectors, but are not designed to be generic production SSIS or Tag Database connectors. Work will be required to support specific customer use cases.

    Prerequisites

    • This solution accelerator is designed to be combined with the Purview Custom Types Tool SA. Installation of this accelerator is required to run the examples in this accelerator.

    Solution Overview

    Architecture

    Purview Custom Connector Solution Accelerator Design

    This accelerator uses Azure Synapse for compute and orchestration. Getting and transforming source metadata is done using Synapse notebooks, and is orchestrated and combined with other Azure Services using Synapse pipelines. Once a solution is developed (see development process below) running the solution involves the following steps:

    1. Scan of custom source is triggered through Synapse pipeline
    2. Custom source notebook code pulls source data and transforms into Atlas json – predefined custom types
    3. Data is written into folder in ADLS
    4. Data write triggers Purview Entity import notebook pipeline
    5. Scan data is written into Purview

    Connector Development Process

    pccsa_dev_processing.svg

    Determine data available from custom source

    The first step in the development process is to determine what metadata is available for the target source, and how to access the metadata. This is a foundational decision and there are often a number of considerations. Some sources might have readily accessible meta-data that can be queried through an API, others may have various file types that need to be transformed and parsed. Some sources require deep access to the virtual machine or on prem server requiring some type of agent (see the SSIS example). For some it might make sense to use the source logs as the meta-data to distinguish between what is defined in a transformation document, and what has been actually applied to the data. For examples of this process, see the SSIS Meta-data and Tag DB Meta-data examples.

    Define types for custom source

    Purview uses Apache Atlas defined types which allows for inter-connectivity with existing management tools and a standardized way to define source types. After determining what meta-data is available for the particular source, the next step is how to represent that data in Purview using Atlas types. This step is called defining the meta-model and there are multiple ways this can be accomplished depending on the metadata source, and the desired visualization of the information. It is easy to derive new types from existing ones, ore create types from scratch using the Purview Custom Type Tool. The examples in this accelerator make use of this tool to define their meta-models (see SSIS Meta-model, and Tag DB Meta-model)

    Develop script for translation of source entity data to purview entities / lineage

    Meta-data parsing is one of the more time consuming aspects of Purview Custom Connector development. It is also an activity which, by its nature, is very bespoke to the particular data source targeted. The parsing examples are provided to illustrate how parsers can be plugged into the solution, and the use of generic Purview templates based on the meta-model types to transform the metadata. There are also some libraries and tools such as Apache Tika which may be helpful for parsing certain kinds of metadata. Parsing examples can be found here: SSIS Parsing, Tag DB Parsing. The resulting entity definition file is passed to the Purview Connector Services for ingestion into Purview.

    Define pipeline and triggers for source connection

    All of the above activities are orchestrated through a Synapse pipeline. The SSIS Pipeline demonstrates a complex example designed to mimic what is found in real customer scenarios. The Tag DB example focuses more on the meta-modeling and Purview visualization of the data.

    Using Synapse pipelines and Spark pools for connector development offers a number of advantages including:

    • UI view of pipeline and parameters allowing operators to run and configure pipelines and view results in a standardized way
    • Built in support for logging
    • Built in scalability by running jobs in a Spark Cluster

    Getting Started

    Deploy Resources / Configuration

    Deploy Base Services

    Instructions for deploying the base connector services, which includes deployment of Synapse, Purview, and Synapse notebooks and pipelines for ingesting custom types into Purview can be found in the Base Services Deployment Doc

    Deploy the Purview Custom Types Tool

    To setup and run the example connectors, you will need to install the Purview Custom Type Tool. This should be done after the creation of the Application Security Principle and the Purview instance it will connect to (as part of Base Service deployment). The security principle information and Purview instance are required to initialize the tool.

    Deploy Examples

    Deploying the example connectors requires running a script from the Cloud Command Shell, along with some manual steps for the more involved SSIS example. Detailed steps can be found in the following documents:

    Run Example Connectors

    For Steps to run the example connectors, please see the example connector documentation (SSIS, Tag DB)

    Purview Development Resources

    Note about Libraries with MPL-2.0 and LGPL-2.1 Licenses

    The following libraries are not explicitly included in this repository, but users who use this Solution Accelerator may need to install them locally and in Azure Synapse to fully utilize this Solution Accelerator. However, the actual binaries and files associated with the libraries are not included as part of this repository, but they are available for installation via the PyPI library using the pip installation tool.

    Contributing

    This project welcomes contributions and suggestions. Most contributions require you to agree to a Contributor License Agreement (CLA) declaring that you have the right to, and actually do, grant us the rights to use your contribution. For details, visit https://cla.opensource.microsoft.com.

    When you submit a pull request, a CLA bot will automatically determine whether you need to provide a CLA and decorate the PR appropriately (e.g., status check, comment). Simply follow the instructions provided by the bot. You will only need to do this once across all repos using our CLA.

    This project has adopted the Microsoft Open Source Code of Conduct. For more information see the Code of Conduct FAQ or contact opencode@microsoft.com with any additional questions or comments.

    Trademarks

    This project may contain trademarks or logos for projects, products, or services. Authorized use of Microsoft trademarks or logos is subject to and must follow Microsoft’s Trademark & Brand Guidelines. Use of Microsoft trademarks or logos in modified versions of this project must not cause confusion or imply Microsoft sponsorship. Any use of third-party trademarks or logos are subject to those third-party’s policies.

    Visit original content creator repository https://github.com/microsoft/Purview-Custom-Connector-Solution-Accelerator
  • 100DaysPython

    #100DaysOfCode with Python

    Binder

    Python

    What is 100 Days of Python ?

    #100DaysOfCode in Python is your perfect companion to take the 100 days of code challenge and be successful. 100 days of code is not just about the commitment. The true power and effectiveness is in having a guide and pursuing the “right-sized” projects. That’s i have 100 deeply practical projects everyday.

    Description

    Throughout this comprehensive, i’ll cover a massive amount of tools and technologies, including:

    • Python 3 – the latest version of Python
    • PyCharm, Jupyter Notebook, Google Colab
    • Python Scripting and Automation
    • Python Game Development
    • Web Scraping
    • Beautiful Soup
    • Selenium Web Driver
    • Request
    • WTForms
    • Data Science
    • Pandas
    • NumPy
    • Matplotlib
    • Plotly
    • Scikit learn
    • Seaborn
    • Turtle
    • Python GUI Desktop App Development
    • Tkinter
    • Front-End Web Development
    • HTML 5
    • CSS 3
    • Bootstrap 4
    • Bash Command Line
    • Git, GitHub and Version Control
    • Backend Web Development
    • Flask
    • REST
    • APIs
    • Databases
    • SQL
    • SQLite
    • PostgreSQL
    • Authentication
    • Web Design
    • Deployment with GitHub Pages, Heroku and GUnicorn and much much more!

    Projects!!!

    • Blackjack

    • Snake Game

    • Pong Game

    • Auto Swipe on Tinder

    • Auto Job Applications on LinkedIn

    • Automate Birthday Emails/SMS

    • Fully Fledged Blog Website

    • Build Your Own Public API

    • Data Science with Google Trends

    • Analysing Lego Datasets

    • Google App Store Analysis

    and much much more!

    Visit original content creator repository https://github.com/AiseKaise/100DaysPython
  • SAT-Solver

    Parallel SAT Solver

    Semester project for Design of Parallel and High Performance Computing class at ETHZ. Includes two communication models for DPLL algorithm that could be combined with local CDCL. If you want to find out more about communication models or other techniques that we have used please refer to our final report.

    Build

    Please follow these steps in order to successfully compile the source code:

    1. Open a terminal and navigate to the directory where you want to store the repository
    2. git clone https://github.com/limo1996/SAT-Solver.git
    3. cd SAT-Solver
    4. cmake .
    5. make
    6. Three executables (./sequential_main, ./parallel_main, ./stealing_main) should be generated

    Invoking

    Three executables are available:

    1. The sequential version of solver is named ./sequential_main
    2. The parallel version that uses master-worker communication pattern is named ./parallel_main
    3. The parallel version that uses work stealing communication pattern is named ./stealing_main and from now we will call it Stealing version

    Usage

    Usage of sequential version:

    ./sequential_main [-s CDCL/DPLL] <CNF_input_file> 
    

    Example usage of sequential version:

    ./sequential_main -s CDCL cnfs/benchmark_formulas/flat75-4.cnf

    Usage of parallel version:

    ./parallel_main [-local-cdcl branching_factor : int] <CNF_input_file>
    

    Example usage of parallel version:

    ./parallel_main -local-cdcl 3 cnfs/benchmark_formulas/ais8.cnf
    

    Usage of stealing version:

    ./stealing_main [-local-cdcl branching_factor : int] <CNF_input_file>
    

    Example usage of stealing version:

    ./stealing_main -local-cdcl 2 cnfs/benchmark_formulas/anomaly.cnf
    

    Testing

    We have developed a testing python wrapper whose documentation can be found here
    The python wrapper can also be used to run the solver on the Euler Supercompute Cluster of ETH.

    Results

    • Final report in pdf format can be found here.
    • Performance graphs can be found here
      and here.

    Visit original content creator repository
    https://github.com/limo1996/SAT-Solver

  • kdgaugeView

    KdGaugeView

    KDGaugeView is a simple and customizable gauge control for Android inspired by LMGaugeView

    open source Android Arsenal build number version number Size Method count License Apache

    Motivation

    I need some clean Guage view for my Android application.

    Getting started

    Installing

    To use this library simply import it by placing the following line under dependencies in your app module’s build.gradle file

    This library is posted in jCenter

    Gradle

    implementation 'in.unicodelabs.sorbh:kdgaugeview:1.0.0'

    Maven

    <dependency>
      <groupId>in.unicodelabs.sorbh</groupId>
      <artifactId>kdgaugeview</artifactId>
      <version>1.0.0</version>
      <type>pom</type>
    </dependency>

    Usage

    After Importing this library you can directly use this view in your view XML

    <in.unicodelabs.kdgaugeview.KdGaugeView
                    android:id="@+id/speedMeter"
                    android:layout_width="wrap_content"
                    android:layout_height="wrap_content"
                    android:layout_gravity="center"
                    app:speed_limit="75" />

    Customization

    For now you can these custom attributes

    • app:maxSpeed=”180″ – max speed for gauge(default = 180)

    • app:minSpeed=”0″ – min speed for gauge(default = 0)

    • app:speed=”60″ – speed for gauge

    • app:speed_limit=”90″ – speed limit for gauge(default = 90)

    • app:unitOfMeasurement=”km/hr” – Speed unit for measurment for gauge(default = Km/Hr)

    • app:animationTime=”2000″ – Animation time in ms

    • app:speedTextSize=”100dp” – Speed text size in the center of the gauge

    • app:unitOfMeasurementTextSize=”30dp” – Unit of measurement text size

    • app:speedLimitTextSize=”15dp” – Speed limit text size

    • app:speedDialRingWidth=”15dp” – Speed Dial ring width

    • app:speedDialRingInnerPadding=”15dp” – Padding between speed dial and division doted ring

    • app:dialActiveColor=”@color/dialActiveColor” – dial active ring color (default = #D3D3D3)

    • app:dialInactiveColor=”@color/dialInactiveColor” – dial inactive ring color (default = #E0E0E0)

    • app:dialSpeedColor=”@color/dialSpeedColor” – dial speed ring color (default = GREEN)

    • app:dialSpeedAlertColor=”@color/dialSpeedAlertColor” – dial speed alert ring color (default = RED)

    • app:subDivisionCircleColor=”@color/subDivisionCircleColor” – sub-division circle color (default = DKGRAY)

    • app:divisionCircleColor=”@color/divisionCircleColor” – division circle color (default = BLUE)

    • app:speedTextColor=”@color/speedTextColor” – speed text color (default = BLACK)

    • app:unitOfMeasurementTextColor=”@color/unitOfMeasurementTextColor” – unit of measurement text color (default = BLACK)

    • app:speedLimitTextColor=”@color/speedLimitTextColor” – speed limit text color (default = BLACK)

    Screenshots

    alt text

    alt text

    Author

    • Saurabh K Sharma – GIT

      I am very new to open source community. All suggestion and improvement are most welcomed.

    Contributing

    1. Fork it (https://github.com/sorbh/kdgaugeView/fork)
    2. Create your feature branch (git checkout -b feature/fooBar)
    3. Commit your changes (git commit -am 'Add some fooBar')
    4. Push to the branch (git push origin feature/fooBar)
    5. Create a new Pull Request

    License

    Copyright 2018 Saurabh Kumar Sharma
    
    Licensed under the Apache License, Version 2.0 (the "License");
    you may not use this file except in compliance with the License.
    You may obtain a copy of the License at
    
        http://www.apache.org/licenses/LICENSE-2.0
    
    Unless required by applicable law or agreed to in writing, software
    distributed under the License is distributed on an "AS IS" BASIS,
    WITHOUT WARRANTIES OR CONDITIONS OF ANY KIND, either express or implied.
    See the License for the specific language governing permissions and
    limitations under the License.
    
    Visit original content creator repository https://github.com/Sorbh/kdgaugeView
  • redstone-near-connectors

    Redstone Near Connectors

    Developer tools for integrating RedStone Oracles with the NEAR smart contracts and dApps.

    🔮 RedStone Oracles

    RedStone is a data ecosystem that delivers frequently updated, reliable and diverse data for your dApps and smart contracts.

    It uses a radically different way of putting oracle data on-chain:

    • RedStone data providers need to sign provided data and broadcast it using the decentralized Streamr pub-sub network. Providers don’t need to push the data on-chain, which allows them to provide way more types of data with significantly higher update frequency
    • End users can receive signed oracle data from the Streamr network and self-deliver it on-chain, attaching it to their transactions
    • On-chain Smart Contracts can verify the data integrity using cryptographic signatures and timestamps

    Additionally, RedStone:

    • Uses token incentives to motivate data providers to maintain data integrity and uninterrupted service
    • Leverages Arweave blockchain as a cheap and permanent decentralized storage for archiving Oracle data and maintaining data providers’ accountability

    To learn more about RedStone oracles design check out the RedStone docs.

    🔗 Near blockchain

    NEAR is a user-friendly and carbon-neutral blockchain, built from the ground up to be performant, secure, and infinitely scalable.

    In technical terms, NEAR is a layer one, sharded, proof-of-stake blockchain built with usability in mind.

    In simple terms, NEAR is blockchain for everyone.

    To learn more about the NEAR blockchain checkout out the official NEAR documentation.

    redstone-near-meme

    🚀 Getting started

    If you would like to use RedStone oracles on the Aurora chain, just go to the main RedStone documentation. It provides comprehensive explanation of integration with EVM-compatible chains.

    👩🏻‍💻 Code structure

    This repository contains implementations of near connectors for both Typescript and Rust smart contracts:

    💡 Examples

    🙋‍♂️ Contact

    Please feel free to contact RedStone team on Discord or send email to core@redstone.finance

    📜 License

    MIT

    Visit original content creator repository https://github.com/redstone-finance/redstone-near-connectors
  • ohun

    ohun: optimizing sound event detection

    lifecycle Dependencies Project Status: Active The project has reached a stable, usable state and is being actively developed. Licence CRAN_Status_Badge Total Downloads Codecov test coverage Status at rOpenSci Software Peer Review

    ohun logo

    ohun is intended to facilitate the automated detection of sound events, providing functions to diagnose and optimize detection routines. It provides utilities for comparing detection and annotations of audio events described by frequency and time boxes.

    The main features of the package are:

    • The use of reference annotations for detection diagnostic and optimization
    • The use of signal detection theory indices to evaluate detection performance

    The package offers functions for:

    • Curate references and acoustic data sets
    • Diagnose detection performance
    • Optimize detection routines based on reference annotations
    • Energy-based detection
    • Template-based detection

    The implementation of detection diagnostics that can be applied to both built in detection methods and to those obtained from other software packages makes the package ohun an useful tool for conducting direct comparisons of the performance of different routines. In addition, the compatibility of ohun with data formats already used by other sound analysis R packages (e.g. seewave, warbleR) enables the integration of ohun into more complex acoustic analysis workflows in a popular programming environment within the research community.

    All functions allow the parallelization of tasks (using the packages parallel and pbapply), which distributes the tasks among several processors to improve computational efficiency. The package works on sound files in ‘.wav’, ‘.mp3’, ‘.flac’ and ‘.wac’ format.

    Install/load the package from CRAN as follows:

    # From CRAN would be
    install.packages("ohun")
    
    #load package
    library(ohun)

    To install the latest developmental version from github you will need the R package remotes:

    remotes::install_github("ropensci/ohun")
    
    #load package
    library(ohun)

    Further system requirements due to the dependency seewave may be needed. Take a look a this link for instruction on how to install/troubleshoot these external dependencies.

    Take a look at the vignettes for an overview of the main features of the packages:

    This package has been peer-reviewed by rOpenSci.


    Please cite ohun as follows:

    Araya-Salas, M. (2022), ohun: diagnosing and optimizing automated sound event detection. R package version 0.1.1.

    Visit original content creator repository https://github.com/ropensci/ohun
  • BLE_Serial

    BLE_Serial

    Application for connecting Bluetooth LE devices to COM ports.

    Supported platforms

    • Windows

    Development requierements

    • CMake version 3.16 or newer.
    • MSVC compiler (may work on other compilers, untested)
    • UWP (on Windows)

    Commands

    ble_serial ls [timeout]

    Description

    Scans for BLE

    Arguments

    • timeout – how long should the scan be running for (in seconds) [Default: 5 seconds]
      devices for timeout seconds and prints the results.

    ble_serial query <device_addr> [timeout=5]

    Description

    Connects to a BLE device with the given address and queries it for all its services and characteristics.

    Arguments

    • device_addr – address of the device that we are trying to connect to (can be obtained with ble_serial ls)
    • timeout – maximum time for estabilishing a connection with the device (in seconds) [Default: 5 seconds]

    ble_serial connect <device_addr> <service_id> <characteristic_id> <com_port_number> [timeout] [baud] [data] [stop] [parity] [refresh_ms]

    Description

    Connects to a BLE device and subscribes to the characteristic with the given characteristic_id and binds it to a COM port and makes a bidirectional tunnel.

    Any data written to the bound COM port will be written to the bound BLE characteristic.

    After the bound characteristic changes the data will be written to the bound COM port.

    Arguments

    • device_addr – address of the device that we are trying to connect to (can be obtained with ble_serial ls)
    • service_id – id of the service to be bound to the COM port
    • characteristic_id – id of the service to be bound to the COM port
    • com_port_number – number of a com port that will be used for binding
    • timeout – maximum time for estabilishing a connection with the device (in seconds) [Default: 5 seconds]
    • baud, data, stop, parity – COM port settings (baud rate, data bits, stop bits, parity bits) [Default: 8-N-1]
    • refresh_ms – every how many milliseconds should the COM port be refreshed [Default: 100 ms]

    Library

    The BLE_Serial can be used also as a C++ library for interfacing with BLE devices and COM ports.

    How to use

    This project uses CMake. You can use git submodules to directly add the project’s source tree to your project.

    Then you can link against BLE_Serial_Lib target in your project.

    Example CMake file

    cmake_minimum_required(VERSION 3.16)
    project(MyProject CXX)
    
    add_subdirectory("path_to_ble_serial_directory")
    
    add_executable(MyExecutable
            src/main.cpp
    )
    
    target_link_libraries(BLE_Serial
            PUBLIC
                BLE_Serial_Lib
    )

    Example C++ aplication

    For an example application use you can see the BLE_Serial app source code

    Documentation

    The library documentation can be found here

    Visit original content creator repository
    https://github.com/that-apex/BLE_Serial

  • contextmap

    Getting started

    Configuration

    Contextmap generates documentation by scanning your code.
    The configuration depends on your project’s programming language and framework.

    In your configurations you need to include the scan-key. This is needed to uniquely identify your organization’s account.
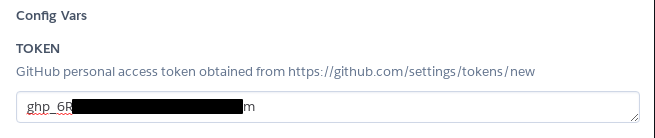
    When you login you will find this key under “Administration > Scan”.

    Java with Spring

    Most of the scanning happens at compile-time for instance the REST API, entities, markdown, etc. these can be
    extracted from the code. However, some things are only known at runtime, for instance Spring beans, config-server settings, etc.
    Therefor to run a complete scan of the code you should configure both the compile-time plugin and runtime dependency.

    Compile-time scan

    To configure compile-time scanning of your project, add the following plugin
    to your pom.xml file. Afterwards you can run the compile-time scan either manually, and/or configure
    your CI/CD pipeline to run the scan.
    The command to run the compile-time scan is “mvn contextmap:scan“.
    Make sure to run this command with the root directory of your project as current directory.

    <build>
      <plugins>
        <plugin>
          <groupId>io.contextmap</groupId>
          <artifactId>java-spring-compiletime</artifactId>
          <version>2.7.0</version>
          <configuration>
            <key>PLACE_KEY_HERE</key>
          </configuration>
        </plugin>
      </plugins>
    </build>
    

    ✔️ We highly recommend to modify your CI/CD pipeline to include the contextmap scan.
    This way your documentation will be automatically kept up to date.

    For multi-module maven projects, the plugin needs to be added only to the root’s pom.xml file. That way all
    child-modules will also be scanned. In this case an additional configuration property is needed to ensure all modules
    are linked to the same component.
    The configuration will look like this:

    <build>
      <plugins>
        <plugin>
          <groupId>io.contextmap</groupId>
          <artifactId>java-spring-compiletime</artifactId>
          <version>2.7.0</version>
          <configuration>
            <key>PLACE_KEY_HERE</key>
            <multiModuleComponentName>COMPONENT_NAME</multiModuleComponentName>
          </configuration>
        </plugin>
      </plugins>
    </build>

    Runtime scan

    To configure the runtime scanning of your project, add the following dependency to your pom.xml file.
    The runtime scan will only happen once at startup of your project.

    <dependencies>
      <dependency>
        <groupId>io.contextmap</groupId>
        <artifactId>java-spring-runtime</artifactId>
        <version>2.7.0</version>
      </dependency>
    </dependencies>

    By default the scan at startup is disabled. To enable it and to define the necessary key, add the following
    to your configuration file (for instance the application.properties file)

    contextmap.key=PLACE_KEY_HERE
    contextmap.enabled=true

    ✔️ If you have multiple environments, such as development, test, production, etc. then you want to make
    sure to only configure the runtime scan on one environment. This way you will have a consistent view
    of a single environment.

    For multi-module maven projects, the dependency needs to be added in the module which is used to run the project.
    (i.e. which contains the executed main method).
    An additional property is required to indicate that the runtime scan needs to be added to a multi-module project.
    The configuration will look like this:

    contextmap.key=PLACE_KEY_HERE
    contextmap.enabled=true
    contextmap.scan.multi-module-component-name=COMPONENT_NAME

    Custom annotations

    Your code already contains lots of knowledge and information, which contextmap scans as-is.
    But sometimes you might want to give a little nudge to your documentation, to emphasize or rephrase something.
    We have foreseen a library with custom annotations that can be used to achieve this.
    To do so, add the following dependency to your pom.xml file.

    <dependencies>
      <dependency>
        <groupId>io.contextmap</groupId>
        <artifactId>java-annotations</artifactId>
        <version>2.7.0</version>
      </dependency>
    </dependencies>

    You can read more below on how to use these custom annotations.
    We do recommend to limit the use of custom annotations to only those cases where it really helps to improve knowledge sharing.

    Deployments

    If you have multiple environments, then you can document which version is deployed to which environment.
    This allows you to see deployments in the releases overview of your components.

    To achieve this, add the following command to your deployment workflow “mvn contextmap:deployment -Dversion=VERSION -Denvironment=ENVIRONMENT“.
    The version and environment parameters are to be filled in by your workflow.

    Community Edition

    One additional configuration setting is required when using the Community Edition, namely the host running the container.
    This should be the same backend url as the environment variable configured on the Docker container.

    Add the following host-property to the compile-time configuration.

    <build>
      <plugins>
        <plugin>
          <groupId>io.contextmap</groupId>
          <artifactId>java-spring-compiletime</artifactId>
          <version>2.7.0</version>
          <configuration>
            ...
            <host>BACKEND_URL</host>
            ...
          </configuration>
        </plugin>
      </plugins>
    </build>

    Add the following host-property for the runtime configuration.

    contextmap.host=BACKEND_URL

    ✔️ Note you can use automatic property expansion to inject Maven properties as Spring properties.

    Typescript

    Any framework which uses typescript can be scanned, for instance Angular, React, etc.
    Also note that with the help of @babel/plugin-proposal-decorators you can also configure a non-typescript pure javascript project.

    Compile-time scan

    To configure compile-time scanning of your project, add the following dev-dependency to your package.json file.
    Afterwards you can run the compile-time scan either manually, and/or configure your CI/CD pipeline to run the scan.
    The command to run the compile-time scan is “npm run contextmap:scan“.

    "scripts": {
      "contextmap:scan": "node node_modules/@contextmap/typescript-compiletime/cli.js"
    },
    "devDependencies": {
      "@contextmap/typescript-compiletime": "^1.9.0",
    },
    "contextmap": {
      "key": "PLACE_KEY_HERE"
    }

    ✔️ We highly recommend to modify your CI/CD pipeline to include the contextmap scan.
    This way your documentation will be automatically kept up to date.

    Instead of configuring the key as a property, you can also add it as argument to the script via --key=PLACE_KEY_HERE. This
    way, you can for instance refer to an environment variable if needed.

    Custom decorators

    Your code already contains lots of knowledge and information, which contextmap scans as-is.
    But sometimes you might want to give a little nudge to your documentation, to emphasize or rephrase something.
    We have foreseen a package with custom decorators that can be used to achieve this.
    To do so, add the following dependency to your package.json file.

    "dependencies": {
      "@contextmap/typescript-decorators": "^1.2.0"
    }

    Deployments

    If you have multiple environments, then you can document which version is deployed to which environment.
    This allows you to see deployments in the releases overview of your components.

    To achieve this, add the following command to your deployment workflow “npm run contextmap:deployment -- --version=VERSION --environment=ENVIRONMENT“.
    The version and environment parameters are to be filled in by your workflow.

    "scripts": {
      "contextmap:deployment": "node node_modules/@contextmap/typescript-compiletime/deployment.js"
    }

    Community Edition

    One additional configuration setting is required when using the Community Edition, namely the host running the container.
    This should be the same backend url as the environment variable configured on the Docker container.

    Either the following host-property should be added to the package.json file.

    "contextmap": {
      ...
      "host": "BACKEND_URL",
      ...
    }

    Or you can also pass the property as parameter using npm run contextmap:your-command -- --host=BACKEND_URL.

    What is documented

    Java with Spring

    Properties

    The properties are scanned at compile-time.
    The overview of a component contains the following details:

    • System name is based on the property contextmap.scan.system-name in your .properties file or .yml file,
      if that’s not available then it falls back to the property systemName from the compile-time plugin’s configuration in the pom.xml file,
      if that’s not available then it falls back to a default value i.e. “Other”
    • Component name is based on the property contextmap.scan.component-name in your .properties file or .yml file,
      if that’s not available then it falls back to the property spring.application.name in your .properties file or .yml file,
      if that’s not available then it falls back to the name in the pom.xml
    • Component aliases are based on the property contextmap.scan.component-aliases in your .properties file or .yml file.
      This is a comma-separated list of aliases used for the component. You can use this for example when you have an old name and new name for the same component,
      or when you have a human-readable name and technical name used during service discovery. (you don’t need to include the component’s name in the list of aliases)
    • Domain vision statement is based on the description in the pom.xml
    • Technology is based on the dependencies in the pom.xml
    • Team is based on the name of the first developer in the pom.xml
    • Team’s organization is based on the organization of the first developer in the pom.xml
    • Team’s email is based on the email of the first developer in the pom.xml
    • Bytes of code is determined by scanning the files in your source folder, counting the filesizes
    • Languages are determined by scanning the files in your source folder, and looking at the filenames
    • Version is based on the version in the pom.xml
    • Url issue management is based on the url from issueManagement’s url in the pom.xml
    • Url source code is based on the remote origin from git
    • Url for external documentation is based on the url in the pom.xml
    • Url buid pipeline is based on the url from ciManagement’s url in the pom.xml
    • Component type is based on the property contextmap.scan.component-type in your .properties file or .yml file,
      its value can be MICROSERVICE, MICROFRONTEND, GATEWAY or LIBRARY.
      If not available, then it falls back to the default value MICROSERVICE.

    If you want to extend the overview and include custom information, then add a property
    contextmap.scan.overview-decision-record in your .properties file or .yml file with the filename of the markdown file
    which needs to be included.

    Domain Entities

    Domain entities are scanned at compile-time based on any of the following annotations:

    • @Entity (javax.persistence.Entity)
    • @MappedSuperclass (javax.persistence.MappedSuperclass)
    • @Document (org.springframework.data.mongodb.core.mapping.Document,
      org.springframework.data.elasticsearch.annotations.Document,
      org.springframework.data.couchbase.core.mapping.Document,
      com.microsoft.azure.spring.data.cosmosdb.core.mapping.Document)
    • @SolrDocument (org.springframework.data.solr.core.mapping.SolrDocument)
    • @RedisHash (org.springframework.data.redis.core.RedisHash)
    • @Table (org.springframework.data.cassandra.core.mapping.Table)
    • @Node (org.springframework.data.neo4j.core.schema.Node)
    • @Container (com.azure.spring.data.cosmos.core.mapping.Container)
    • @ContextAggregateRoot (io.contextmap.annotations.ContextAggregateRoot)
    • @ContextEntity (io.contextmap.annotations.ContextEntity)

    For example:

    // For example when using JPA 
    @Entity
    public class Order {
    
    }
    
    // For example, when a class is considered part of the domain
    // even when it is not necessarily persisted
    @ContextEntity
    public class Order {
    
    }

    The following annotations will identify an entity as aggregate root:

    • @ContextAggregateRoot (io.contextmap.annotations.ContextAggregateRoot)
    • @Document (org.springframework.data.mongodb.core.mapping.Document,
      org.springframework.data.elasticsearch.annotations.Document,
      org.springframework.data.couchbase.core.mapping.Document,
      com.microsoft.azure.spring.data.cosmosdb.core.mapping.Document)
    • @SolrDocument (org.springframework.data.solr.core.mapping.SolrDocument)
    • @Container (com.azure.spring.data.cosmos.core.mapping.Container)

    For example:

    @Entity
    @ContextAggregateRoot
    public class Order {
    
    }

    The custom annotation @ContextSoftLink can be used to identify a soft-link between entities.
    This can be used to link entities from the same component, but also between different components.
    Use this annotation to document otherwise hidden dependencies between entities.

    For example to link to an entity in the same component:

    @Entity
    public class ProductReadModel {
        
      @ContextSoftLink(entity = Product.class)
      private UUID id;
      
    }

    For example to link to an entity in another component:

    @Entity
    public class OrderItem {
        
      @ContextSoftLink(component = "inventory-service", entityName = "Product")
      private UUID productId;
      
    }

    Published REST API

    The published REST API is scanned at compile-time.
    The following annotations will identify a class as a published REST API:

    • @RestController (org.springframework.web.bind.annotation.RestController)
    • @Controller (org.springframework.stereotype.Controller)

    Any method included in such a class with one of the following annotations, is seen as a published endpoint

    • @GetMapping (org.springframework.web.bind.annotation.GetMapping)
    • @PostMappping (org.springframework.web.bind.annotation.PostMapping)
    • @PutMapping (org.springframework.web.bind.annotation.PutMapping)
    • @DeleteMapping (org.springframework.web.bind.annotation.DeleteMapping)
    • @PatchMapping (org.springframework.web.bind.annotation.PatchMapping)
    • @RequestMapping (org.springframework.web.bind.annotation.RequestMapping)

    REST API’s are grouped per class in which they are defined. By default the class’ name will be used as title for the group.
    You could annotate the class with any of the following annotations. These provide attributes to customize the name and description
    which are displayed for the group of REST API’s.

    • Swagger’s @Tag (io.swagger.v3.oas.annotations.tags.Tag)
    • Swagger’s @Api (io.swagger.annotations.Api)
    • Custom annotation @ContextRestApi (io.contextmap.annotations.rest.ContextRestApi)

    Methods can be documented by any of the following annotations. This way a description can be added to the endpoint methods.

    • Swagger’s @Operation (io.swagger.v3.oas.annotations.Operation)
    • Swagger’s @ApiOperation (io.swagger.annotations.ApiOperation)
    • Custom annotation @ContextRestEndpoint (io.contextmap.annotations.rest.ContextRestEndpoint)

    A requestbody or responsebody can be documented by any of the following annotations.

    • Swagger’s @Schema (io.swagger.v3.oas.annotations.media.Schema) for type and properties documentation
    • Swagger’s @ApiModelProperty (io.swagger.annotations.ApiModelProperty) for properties documentation
    • Swagger’s @ApiModel (io.swagger.annotations.ApiModel) for type documentation
    • Custom annotation @ContextApiProperty (io.contextmap.annotations.ContextApiProperty) for properties documentation
    • Custom annotation @ContextApi (io.contextmap.annotations.ContextApi) for type documentation

    For example:

    // Using custom annotations
    @ContextApi(description = "A confirmed order")
    public class OrderDto {
        
      @ContextApiProperty(description = "This datetime is in ISO-8601", example = "2021-12-31")
      private LocalDateTime createdOn;
    
    }
    
    // Using Swagger annotation
    @Schema(description = "A confirmed order")
    public class OrderDto {
        
      @Schema(description = "This datetime is in ISO-8601", example = "2021-12-31")
      private LocalDateTime createdOn;
    
    }

    By default the name of a property’s class is used as its datatype.
    Also by default, all possible values of an enum property are included as example.

    If no endpoints are found while scanning for annotations, then a scan for Spring REST Docs snippets occurs.
    During the build of projects which use Spring REST Docs to document the api, you will need to make sure that
    the snippets are generated before scanning for contextmap, i.e. the tests need to have run.

    Subscribed REST API

    The subscribed REST API is scanned at compile-time.
    The synchronous links between components in contextmap are based on the subscribed REST APIs.
    The following annotations will identify a class as a subscribed REST API, and as such
    create a link between the components. The name attribute of these annotations will be used, to
    identify the component.

    • @FeignClient (org.springframework.cloud.openfeign.FeignClient)
    • @FeignClient (org.springframework.cloud.netflix.feign.FeignClient)
    • @LoadBalancerClient (org.springframework.cloud.loadbalancer.annotation.LoadBalancerClient)
    • @LoadBalancerClients (org.springframework.cloud.loadbalancer.annotation.LoadBalancerClients)
    • @ContextClient (io.contextmap.annotations.client.ContextClient), can be used on class level and method level

    The custom annotation @ContextClient can be used to model any dependency, not just REST.

    When using Spring Cloud Gateway, the configuration files are scanned to find routes.
    Any configured route which has a load balanced uri-property (i.e. starting with “lb://”) will be identified
    as a link to another component.

    For example:

    // Example using feign.
    @FeignClient(name = "order-service")
    public interface OrderClient {
        
      @GetMapping("/orders")
      List<Order> getOrders();
    
    }
    
    // Example using http exchange. This requires the use of custom annotation ContextClient to detect the interface.
    // This is an example using the reactive stack, but the servlet stack is also supported.
    @ContextClient(name = "order-service")
    public interface OrderClient {
        
        @GetExchange("/orders")
        Flux<Order> getOrders();
    
    }

    Events

    Events are scanned at runtime.
    The asynchronous links between components in contextmap are based on the events.
    Contextmap currently supports scanning events for the following message brokers

    • RabbitMQ
    • ActiveMQ (JMS)
    • Kafka
    • Azure EventHub
    • Azure ServiceBus
    RabbitMQ

    Exchanges on which the scanned component publishes messages are scanned by finding Spring beans of type

    • Exchange (org.springframework.amqp.core.Exchange)
    • RabbitTemplate (org.springframework.amqp.rabbit.core.RabbitTemplate)

    Also logback AMQP appenders are scanned and identified as exchanges.

    Queues on which a component subscribes are scanned by finding Spring beans of type
    Binding (org.springframework.amqp.core.Binding)

    When using Spring Cloud Stream then producers and consumers are scanned.

    ActiveMQ (JMS)

    Queues/Topics on which the scanned component publishes messages are scanned by finding Spring beans of type

    • Queue (javax.jms.Queue)
    • Topic (javax.jms.Topic)

    Queues/Topics on which the scanned component subscribes are scanned by finding beans with methods
    annotated with @JmsListener (org.springframework.jms.annotation.JmsListener)

    Kafka

    Topics on which the scanned component publishes messages are scanned by finding Spring beans of type

    • NewTopic (org.apache.kafka.clients.admin.NewTopic)
    • KafkaTemplate (org.springframework.kafka.core.KafkaTemplate)

    Topics on which a component subscribes are scanned by finding Spring beans annotated by
    KafkaListener (org.springframework.kafka.annotation.KafkaListener)

    When using Spring Cloud Stream then producers and consumers are scanned.

    Azure ServiceBus

    When using Spring Cloud Stream then producers and consumers are scanned.

    Azure EventHub

    EventHubs on which the scanned component publishes messages are scanned by finding Spring beans of type

    • EventHubProducerClient (com.azure.messaging.eventhubs.EventHubProducerClient)
    • EventHubProducerAsyncClient (com.azure.messaging.eventhubs.EventHubProducerAsyncClient)

    EventHubs on which a component subscribes are scanned by finding Spring beans of type

    • EventHubConsumerClient (com.azure.messaging.eventhubs.EventHubConsumerClient)
    • EventHubConsumerAsyncClient (com.azure.messaging.eventhubs.EventHubConsumerAsyncClient)
    Event Payload

    Use the custom annotation @ContextEvent to allow contextmap to identify the payload
    (or potentially multiple payloads) of an event which is published.

    Any annotation used to document a REST requestbody or responsebody, can also be used to document the payload of an event.

    For example:

    // For RabbitMQ you can refer to the name of an Exchange or RabbitTemplate registered as Spring Bean,
    // or use SpEL to refer to a property, or directly use the name of the exchange
    // (Note: only reference a RabbitTemplate Spring Bean, when it's default exchange is configured)
    @ContextEvent(publishedBy = "orderCreatedExchange")
    public class OrderCreated {
        
      @ContextApiProperty(description = "This datetime is in ISO-8601", example = "2021-12-31")
      private LocalDateTime createdOn;
      
    }
    
    // For ActiveMQ you can refer to the name of a Queue or Topic registered as Spring Bean,
    // or use SpEL to refer to a property, or directly use the name of the topic/queue
    @ContextEvent(publishedBy = "orderCreatedTopic")
    public class OrderCreated {
    
    }
    
    // For Kafka you can refer to the name of a Topic or KafkaTemplate registered as Spring Bean,
    // or use SpEL to refer to a property, or directly use the name of the topic
    // Note: when using Kafka Cloud Stream you can only use a SpEL expression or directly use the name of the topic
    @ContextEvent(publishedBy = "orderCreatedTopic")
    public class OrderCreated {
    
    }
    
    // Example of referring to a configuration property (e.g. when using Spring Cloud Stream)
    @ContextEvent(publishedBy = "${order-created.exchange}")
    public class OrderCreated {
    
    }
    
    // Example of referring to the actual name (e.g. when using Spring Cloud Stream)
    @ContextEvent(publishedBy = "order-created")
    public class OrderCreated {
    
    }

    Storages

    Storages are scanned at runtime.
    Contextmap currently supports scanning the following types of storages:

    • JDBC databases are scanned by finding Spring beans of type DataSource
      (javax.sql.DataSource).
      Tables and views for the current schema/catalog of the database are included in the scan.
    • MongoDB is scanned by finding Spring beans of type MongoTemplate
      (org.springframework.data.mongodb.core.MongoTemplate) and ReactiveMongoTemplate
      (org.springframework.data.mongodb.core.ReactiveMongoTemplate)
    • CosmosDB is scanned by finding Spring beans of type CosmosTemplate
      (com.azure.spring.data.cosmos.core.CosmosTemplate) and ReactiveCosmosTemplate
      (com.azure.spring.data.cosmos.core.ReactiveCosmosTemplate)
    • Solr is scanned by finding Spring beans of type SolrTemplate
      (org.springframework.data.solr.core.SolrTemplate)
    • ElasticSearch is scanned by finding Spring beans of type RestHighLevelClient
      (org.elasticsearch.client.RestHighLevelClient), if none are detected then bean of type RestClient
      (org.elasticsearch.client.RestClient) are scanned
    • Caches are scanned by getting the caches from Spring’s CacheManager
      (org.springframework.cache.CacheManager)

    Furthermore, a custom annotation @ContextStorage (io.contextmap.annotations.storage.ContextStorage)
    can be used to symbolize any custom types of storage

    // Example of a class responsible for accessing certain files
    // ContextMap can not discover this storage because there is no well-defined SpringBean, hence the need for the custom annotation
    @ContextStorage(name = "training-sets", type = StorageType.FILE_SYSTEM)
    public class TrainingSetData {
    
    }

    For JDBC databases the tables and views are documented. For MongoDB the collections are documented, and schema analysis
    is done based on the first 100 documents in a collection.

    Decision records

    Decision records and other markdown files are scanned at compile-time.
    This is done by looking at the source folder and checking the file-extension.
    Each file with extension .md, .ad or .adr will be included.

    Unmodified files will be ignored. If you modify a file which was previously scanned, then
    the next time it is scanned it will be updated.

    Note that Mermaid diagrams can be included.

    Diagrams

    PlantUML diagrams included in your project are scanned at compile-time.
    This is done by looking at the source folder and checking the file-extension.
    Each file with extension .puml, .iuml or .plantuml will be included.

    Unmodified files will be ignored. If you modify a file which was previously scanned, then
    the next time it is scanned it will be updated.

    The Smetana rendering engine of PlantUML is used. Depending on the diagram, this means you may need to add
    an extra configuration line to ensure the diagram is rendered correctly.

    @startuml
    !pragma layout smetana    <-- extra configuration line
    
    @enduml

    Features

    Features are scanned at compile-time.
    This is done by looking at the source folder and checking the file-extension.
    Each file with extension .feature, or .story will be included.

    Unmodified files will be ignored. If you modify a file which was previously scanned, then
    the next time it is scanned it will be updated.

    Releases

    Releases are scanned at compile-time.
    All local tags in Git will be included. The commits associated with each tag are also included.
    Only the date and the message of a commit is tracked.
    Other information (such as the person who made the commit) is not tracked.

    Recent Commits

    Recent commits are scanned at compile-time.
    All commits in Git from the last 90 days will be included.
    Only the date and the message of a commit is tracked.
    Other information (such as the person who made the commit) is not tracked.

    Glossary

    The glossary terms are scanned at compile-time.
    Use the custom annotation @ContextGlossary to scan for terms to include in your glossary.
    For example:

    @ContextGlossary("A request to make, supply, or deliver food or goods")
    public class Order {
    
    }

    You can specify the name attribute in case the name of the class is not the term you want to use in the glossary.
    You can also document any aliases which could be used for the same term.

    @ContextGlossary(
      value = "A list of goods sent or services provided, with a statement of the sum due for these",
      name = "Invoice",
      aliases = {"Bill"}
    )
    public class InvoiceEntity {
    
    }

    Tech Radar

    The tech radar entries are scanned at compile-time.
    You typically will want to manage this from a single “architecture governance” project, instead of having contributions from multiple components.
    This architecture governance project would require only a single file, namely the pom.xml

    To define the tech radar entries, add the following configuration to the plugin inside the pom.xml

    <plugin>
      <groupId>io.contextmap</groupId>
      <artifactId>java-spring-compiletime</artifactId>
      <version>2.7.0</version>
      <configuration>
        <key>PLACE_KEY_HERE</key>
        <techRadar>
          <entries>
            <entry>
              <label>Name of the entry, e.g. GitHub Actions</label>
              <link>Link to external website (optional), e.g. https://www.github.com</link>
              <description>A description of the entry (optional)</description>
              <quadrant>Either: TOOLS, TECHNIQUES, FRAMEWORKS, LANGUAGES (optional, default is TOOLS)</quadrant>
              <ring>Either: ADOPT, TRIAL, ASSESS, HOLD (optional, default is HOLD)</ring>
              <movement>Either: NONE, UP, DOWN (optional, default is NONE)</movement>
            </entry>
          </entries>
        </techRadar>
      </configuration>
    </plugin>

    Capabilities

    The business capabilities of a component are scanned at compile-time.
    There are 3 ways to document capabilities:

    • using pom.xml
    • using properties (*.properties or *.yml)
    • using annotations

    Example when using pom.xml:

     <plugin>
      <groupId>io.contextmap</groupId>
      <artifactId>java-spring-compiletime</artifactId>
      <configuration>
        ...
        <capabilities>
          <capability>Inventory management</capability>
          <capability>Legal and compliance</capability>
        </capabilities>
        ...
      </configuration>
    </plugin>

    Example when using properties:

    # Specify the capabilities as a comma-separated list
    # e.g. in application.properties
    contextmap.scan.capabilities=Inventory management, Legal and compliance
    
    # e.g. in application.yml
    contextmap:
      scan:
        capabilities: Inventory management, Legal and compliance
    

    Example when using annotations:

    // When specifying a single capability you can use 
    @ContextCapability("Legal and compliance")
    public class ComplaintsApplication {
    
    }
    
    // Or when specifying multiple capabilities you can use 
    @ContextCapabilities({
      @ContextCapability("Inventory management"),
      @ContextCapability("Legal and compliance")
    })
    public class InventoryApplication {
    
    }

    Actors

    The actors of a component are scanned at compile-time.
    Use the custom annotation @ContextActor to indicate that a certain actor uses the component.

    For example:

    @ContextActor("Helpdesk")
    public class OrderApplication {
    
    }

    Or use @ContextActors, to link multiple actors at once.

    For example:

    @ContextActors({
      @ContextActor("Data Scientist"),
      @ContextActor("Data Engineer")
    })
    public class DataAnalysisApplication {
    
    }

    Exemplary Code

    Documenting exemplary code happens at compile time.
    Use the custom annotation @ContextExemplar to indicate that a certain file or class should be considered the starting point of the exemplary code.

    For example:

    @ContextExemplar(
      title = "Oracle & RabbitMQ Testcontainer",
      description = "This integration test uses two testcontainers (RabbitMQ and Oracle) to simulate the production environment perfectly.",
      tags = { "testcontainer", "oracle", "rabbitmq" }
    )
    public class OrderPlacementContainerTest {
    
    }

    Typescript

    Properties

    The properties are scanned at compile-time.
    The overview of a component contains the following details:

    • System name is based on the property contextmap.scan.systemName from the package.json file, or you can override this by passing it as argument systemName, if neither are defined then it falls back to a default value i.e. “Other”
    • Component name is based on the property name from the package.json file, or you can override this by passing it as argument componentName
    • Component aliases are based on the property contextmap.scan.aliases from the package.json file.
      This is an array of aliases used for the component. You can use this for example when you have an old name and new name for the same component,
      or when you have a human-readable name and technical name. (you don’t need to include the component’s name in the list of aliases)
    • Domain vision statement is based on the description from the package.json file
    • Technology is based on the dependencies from the package.json file
    • Team is based on the property author.name from the package.json file
    • Team’s organization is based on the property contextmap.scan.organization from the package.json file
    • Team’s email is based on the property author.email from the package.json file
    • Bytes of code is determined by scanning the source files, counting the filesizes
    • Languages are determined by scanning the source files, and looking at the filenames
    • Version is based on the version from the package.json file
    • Url issue management is based on the bugs url from the package.json file
    • Url source code is based on the repository url from the package.json file
    • Url for external documentation is based on the homepage from the package.json file
    • Component type is based on the property contextmap.scan.componentType from the package.json file,
      its value can be MICROSERVICE, MICROFRONTEND, GATEWAY or LIBRARY
      if not available then it falls back to the default value MICROFRONTEND

    If you want to extend the overview and include custom information, then add a property
    contextmap.scan.overviewDecisionRecord to the package.json file, with the filename of the markdown file
    which needs to be included.

    Subscribed REST API

    The subscribed REST API is scanned at compile-time.
    The synchronous links between components in contextmap are based on the subscribed REST APIs.
    Use the custom decorator @ContextClient to identify a dependency to another component.

    For example:

    @ContextClient('webshop-site-gateway')
    export class GatewayHttpService {
    
    }

    Decision records

    Decision records and other markdown files are scanned at compile-time.
    This is done by looking at the source folder and checking the file-extension.
    Each file with extension .md, .ad or .adr will be included.

    Unmodified files will be ignored. If you modify a file which was previously scanned, then
    the next time it is scanned it will be updated.

    Note that Mermaid diagrams can be included.

    Features

    Features are scanned at compile-time.
    This is done by looking at the source folder and checking the file-extension.
    Each file with extension .feature, or .story will be included.

    Unmodified files will be ignored. If you modify a file which was previously scanned, then
    the next time it is scanned it will be updated.

    Releases

    Releases are scanned at compile-time.
    All local tags in Git will be included. The commits associated with each tag are also included.
    Only the date and the message of a commit is tracked.
    Other information (such as the person who made the commit) is not tracked.

    Recent Commits

    Recent commits are scanned at compile-time.
    All commits in Git from the last 90 days will be included.
    Only the date and the message of a commit is tracked.
    Other information (such as the person who made the commit) is not tracked.

    Glossary

    The glossary terms are scanned at compile-time.
    Use the custom decorator @ContextGlossary to scan for terms to include in your glossary.
    For example:

    @ContextGlossary({ definition: 'A request to make, supply, or deliver food or goods' })
    export class Order {
    
    }

    You can specify the name attribute in case the name of the class is not the term you want to use in the glossary.
    You can also document any aliases which could be used for the same term.

    @ContextGlossary({
      name: 'Invoice',
      definition: 'A list of goods sent or services provided, with a statement of the sum due for these',
      aliases: ['Bill']
    })
    export class InvoiceEntity {
    
    }

    Tech Radar

    The tech radar entries are scanned at compile-time.
    You typically will want to manage this from a single “architecture governance” project, instead of having contributions from multiple components.
    This architecture governance project would require only a single file, namely the package.json

    To define the tech radar entries, add the following configuration to the contextmap section inside the package.json

    "contextmap": {
      "key": "PLACE_KEY_HERE",
      "techRadar": {
        "entries": [
            {
              "label": "Name of the entry, e.g. GitHub Actions",
              "link": "Link to external website (optional), e.g. https://www.github.com</link>",
              "description": "A description of the entry (optional)",
              "quadrant": "Either: TOOLS, TECHNIQUES, FRAMEWORKS, LANGUAGES (optional, default is TOOLS)",
              "ring": "Either: ADOPT, TRIAL, ASSESS, HOLD (optional, default is HOLD)",
              "movement": "Either: NONE, UP, DOWN (optional, default is NONE)"
            }
        ]
      }
    }

    Capabilities

    The business capabilities of a component are scanned at compile-time.
    There are 2 ways to document capabilities:

    • using package.json
    • using decorators

    Example when using package.json:

    contextmap: {
      scan: {
        ...
        capabilities: ["Inventory management", "Legal and compliance"],
        ...
      }
    }

    Example when using decorators:

    // When specifying a single capability you can use 
    @ContextCapability("Legal and compliance")
    export class ComplaintsAppComponent {
    
    }
    
    // Or when specifying multiple capabilities you can use 
    @ContextCapabilities(["Inventory management", "Legal and compliance"])
    export class InventoryAppComponent {
    
    }

    Actors

    The actors of a component are scanned at compile-time.
    Use the custom decorator @ContextActor/@ContextActors to indicate that a certain actor uses the component.

    For example:

    @ContextActor('Customer')
    export class AppComponent {
    
    }

    Or in case there are multiple actors:

    @ContextActors(['Customer', 'Support'])
    export class AppComponent {
    
    }

    Exemplary Code

    Documenting exemplary code happens at compile time.
    Use the custom decorator @ContextExemplar to indicate that a certain class should be considered the starting point of the exemplary code.

    For example:

    @ContextExemplar({
        title = 'NgRx Action Hygiene',
        description = 'Example of good NgRx action hygiene in combination with lazy loaded modules',
        tags = {'ngrx'}
    })
    export class OrderActions {
    
    }

    Visit original content creator repository
    https://github.com/contextmap/contextmap

  • github-streak-stats-personal

    Github Readme Streak Stats

    Display your total contributions, current streak,
    and longest streak on your GitHub profile README

    ⚡ Quick setup

    1. Copy-paste the markdown below into your GitHub profile README
    2. Replace the value after ?user= with your GitHub username
    [![GitHub Streak](https://streak-stats.demolab.com/?user=DenverCoder1)](https://git.io/streak-stats)
    1. Star the repo 😄

    Next Steps

    Deploy to Heroku Deploy to Vercel

    ⚙ Demo Site

    Here you can customize your Streak Stats card with a live preview.

    https://streak-stats.demolab.com

    Demo Site

    🔧 Options

    The user field is the only required option. All other fields are optional.

    If the theme parameter is specified, any color customizations specified will be applied on top of the theme, overriding the theme’s values.

    Parameter Details Example
    user GitHub username to show stats for DenverCoder1
    theme The theme to apply (Default: default) dark, radical, etc. 🎨➜
    hide_border Make the border transparent (Default: false) true or false
    border_radius Set the roundness of the edges (Default: 4.5) Number 0 (sharp corners) to 248 (ellipse)
    background Background color (eg. f2f2f2, 35,d22,00f) hex code without #, css color, or gradient in the form angle,start_color,...,end_color
    border Border color hex code without # or css color
    stroke Stroke line color between sections hex code without # or css color
    ring Color of the ring around the current streak hex code without # or css color
    fire Color of the fire in the ring hex code without # or css color
    currStreakNum Current streak number hex code without # or css color
    sideNums Total and longest streak numbers hex code without # or css color
    currStreakLabel Current streak label hex code without # or css color
    sideLabels Total and longest streak labels hex code without # or css color
    dates Date range text color hex code without # or css color
    excludeDaysLabel Excluded days of the week text color hex code without # or css color
    date_format Date format pattern or empty for locale format See note below on 📅 Date Formats
    locale Locale for labels and numbers (Default: en) ISO 639-1 code – See 🗪 Locales
    short_numbers Use short numbers (e.g. 1.5k instead of 1,500) true or false
    type Output format (Default: svg) Current options: svg, png or json
    mode Streak mode (Default: daily) daily (contribute daily) or weekly (contribute once per Sun-Sat week)
    exclude_days List of days of the week to exclude from streaks Comma-separated list of day abbreviations (Sun, Mon, Tue, Wed, Thu, Fri, Sat) e.g. Sun,Sat
    disable_animations Disable SVG animations (Default: false) true or false
    card_width Width of the card in pixels (Default: 495) Positive integer, minimum width is 100px per column
    card_height Height of the card in pixels (Default: 195) Positive integer, minimum height is 170px
    hide_total_contributions Hide the total contributions (Default: false) true or false
    hide_current_streak Hide the current streak (Default: false) true or false
    hide_longest_streak Hide the longest streak (Default: false) true or false
    starting_year Starting year of contributions Integer, must be 2005 or later, eg. 2017. By default, your account creation year is used.

    🖌 Themes

    To enable a theme, append &theme= followed by the theme name to the end of the source URL:

    [![GitHub Streak](https://streak-stats.demolab.com/?user=DenverCoder1&theme=dark)](https://git.io/streak-stats)
    Theme Preview
    default default
    dark dark
    highcontrast highcontrast
    More themes! 🎨 See a list of all available themes

    If you have come up with a new theme you’d like to share with others, please see Issue #32 for more information on how to contribute.

    🗪 Locales

    The following are the locales that have labels translated in Streak Stats. The locale query parameter accepts any ISO language or locale code, see here for a list of valid locales. The locale provided will be used for the date format and number format even if translations are not yet available.

    en – English
    English 100%
    am – አማርኛ
    አማርኛ 100%
    ar – العربية
    العربية 100%
    ca – català
    català 100%
    ceb – Binisaya
    Binisaya 100%
    da – dansk
    dansk 100%
    de – Deutsch
    Deutsch 100%
    el – Ελληνικά
    Ελληνικά 100%
    es – español
    español 100%
    fa – فارسی
    فارسی 100%
    fil – Filipino
    Filipino 100%
    fr – français
    français 100%
    gu – ગુજરાતી
    ગુજરાતી 100%
    he – עברית
    עברית 100%
    hi – हिन्दी
    हिन्दी 100%
    hu – magyar
    magyar 100%
    id – Indonesia
    Indonesia 100%
    it – italiano
    italiano 100%
    ja – 日本語
    日本語 100%
    jv – Jawa
    Jawa 100%
    kn – ಕನ್ನಡ
    ಕನ್ನಡ 100%
    ko – 한국어
    한국어 100%
    mr – मराठी
    मराठी 100%
    ms – Melayu
    Melayu 100%
    my – မြန်မာ
    မြန်မာ 100%
    ne – नेपाली
    नेपाली 100%
    nl – Nederlands
    Nederlands 100%
    no – norsk
    norsk 100%
    pl – polski
    polski 100%
    ps – پښتو
    پښتو 100%
    pt_BR – português (Brasil)
    português (Brasil) 100%
    ru – русский
    русский 100%
    sa – संस्कृत भाषा
    संस्कृत भाषा 100%
    sd_PK – سنڌي (پاڪستان)
    سنڌي (پاڪستان) 100%
    sr – српски
    српски 100%
    su – Basa Sunda
    Basa Sunda 100%
    sw – Kiswahili
    Kiswahili 100%
    th – ไทย
    ไทย 100%
    tr – Türkçe
    Türkçe 100%
    uk – українська
    українська 100%
    ur_PK – اردو (پاکستان)
    اردو (پاکستان) 100%
    vi – Tiếng Việt
    Tiếng Việt 100%
    yo – Èdè Yorùbá
    Èdè Yorùbá 100%
    zh_Hans – 中文(简体)
    中文(简体) 100%
    zh_Hant – 中文(繁體)
    中文(繁體) 100%
    bg – български
    български 86%
    bn – বাংলা
    বাংলা 86%
    ht – Haitian Creole
    Haitian Creole 86%
    hy – հայերեն
    հայերեն 86%
    rw – Kinyarwanda
    Kinyarwanda 86%
    sv – svenska
    svenska 86%
    ta – தமிழ்
    தமிழ் 86%

    If you would like to help translate the Streak Stats cards, please see Issue #236 for more information.

    📅 Date Formats

    If date_format is not provided or is empty, the PHP Intl library is used to determine the date format based on the locale specified in the locale query parameter.

    A custom date format can be specified by passing a string to the date_format parameter.

    The required format is to use format string characters from PHP’s date function with brackets around the part representing the year.

    When the contribution year is equal to the current year, the characters in brackets will be omitted.

    Examples:

    Date Format Result
    d F[, Y]
    "2020-04-14" => "14 April, 2020"
    "2024-04-14" => "14 April"
    j/n/Y
    "2020-04-14" => "14/4/2020"
    "2024-04-14" => "14/4/2024"
    [Y.]n.j
    "2020-04-14" => "2020.4.14"
    "2024-04-14" => "4.14"
    M j[, Y]
    "2020-04-14" => "Apr 14, 2020"
    "2024-04-14" => "Apr 14"

    Example

    [![GitHub Streak](https://streak-stats.demolab.com/?user=denvercoder1&currStreakNum=2FD3EB&fire=pink&sideLabels=F00&date_format=[Y.]n.j)](https://git.io/streak-stats)

    ℹ️ How these stats are calculated

    This tool uses the contribution graphs on your GitHub profile to calculate which days you have contributed.

    To include contributions in private repositories, turn on the setting for “Private contributions” from the dropdown menu above the contribution graph on your profile page.

    Contributions include commits, pull requests, and issues that you create in standalone repositories.

    The longest streak is the highest number of consecutive days on which you have made at least one contribution.

    The current streak is the number of consecutive days ending with the current day on which you have made at least one contribution. If you have made a contribution today, it will be counted towards the current streak, however, if you have not made a contribution today, the streak will only count days before today so that your streak will not be zero.

    Note

    You may need to wait up to 24 hours for new contributions to show up (Learn how contributions are counted)

    📤 Deploying it on your own

    It is preferable to host the files on your own server and it takes less than 2 minutes to set up.

    Doing this can lead to better uptime and more control over customization (you can modify the code for your usage).

    You can deploy the PHP files on any website server with PHP installed including Heroku and Vercel.

    The Inkscape dependency is required for PNG rendering, as well as Segoe UI font for the intended rendering. If using Heroku, the buildpacks will install these for you automatically.

    Deploy to Vercel

    Vercel is the recommended option for hosting the files since it is free and easy to set up. Watch the video below or expand the instructions to learn how to deploy to Vercel.

    Note

    PNG mode is not supported since Inkscape will not be installed but the default SVG mode will work.

    Instructions for deploying to Vercel (Free)

    Step-by-step instructions for deploying to Vercel

    Option 1: Deploy to Vercel quickly with the Deploy button (recommended)

    1. Click the Deploy button below

    Deploy with Vercel

    1. Create your repository by filling in a Repository Name and clicking “Create”
    2. Visit this link to create a new Personal Access Token (no scopes required)
    3. Scroll to the bottom and click “Generate token”
    4. Add the token as a Config Var with the key TOKEN:

    vercel environment variables

    1. Click “Deploy” at the end of the form
    2. Once the app is deployed, click the screenshot of your app or continue to the dashboard to find your domain to use in place of streak-stats.demolab.com

    deployment

    ⚠️ Note If you receive an error related to libssl or Node 20.x, you can fix this by opening your Vercel project settings and changing the Node.js version to 18.x.

    image

    Option 2: Deploy to Vercel manually

    1. Sign in to Vercel or create a new account at https://vercel.com
    2. Use the following command to clone the repository: git clone https://github.com/DenverCoder1/github-readme-streak-stats.git. If you plan to make changes, you can also fork the repository and clone your fork instead. If you do not have Git installed, you can download it from https://git-scm.com/downloads.
    3. Navigate to the cloned repository’s directory using the command cd github-readme-streak-stats
    4. Switch to the “vercel” branch using the command git checkout vercel
    5. Make sure you have the Vercel CLI (Command Line Interface) installed on your system. If not, you can download it from https://vercel.com/download.
    6. Run the command vercel and follow the prompts to link your Vercel account and choose a project name
    7. After successful deployment, your app will be available at <project-name>.vercel.app
    8. Open this link to create a new Personal Access Token on GitHub. You don’t need to select any scopes for the token.
    9. Scroll to the bottom of the page and click on “Generate token”
    10. Visit the Vercel dashboard at https://vercel.com/dashboard and select your project. Then, click on “Settings” and choose “Environment Variables”.
    11. Add a new environment variable with the key TOKEN and the value as the token you generated in step 9, then save your changes
    12. To apply the new environment variable, you need to redeploy the app. Run vercel --prod to deploy the app to production.

    image

    ⚠️ Note
    To set up automatic Vercel deployments from GitHub, make sure to turn off “Include source files outside of the Root Directory” in the General settings and use vercel as the production branch in the Git settings.

    ⚠️ Note
    If you receive an error related to libssl or Node 20.x, you can fix this by opening your Vercel project settings and changing the Node.js version to 18.x.

    image

    Deploy on Heroku

    Heroku is another great option for hosting the files. All features are supported on Heroku and it is where the default domain is hosted. Heroku is not free, however, and you will need to pay between $5 and $7 per month to keep the app running. Expand the instructions below to learn how to deploy to Heroku.

    Instructions for deploying to Heroku (Paid)

    Step-by-step instructions for deploying to Heroku

    1. Sign in to Heroku or create a new account at https://heroku.com
    2. Visit this link to create a new Personal Access Token (no scopes required)
    3. Scroll to the bottom and click “Generate token”
    4. Click the Deploy button below

    Deploy to Heroku

    1. Add the token as a Config Var with the key TOKEN:

    heroku config variables

    1. Click “Deploy App” at the end of the form
    2. Once the app is deployed, you can use <your-app-name>.herokuapp.com in place of streak-stats.demolab.com

    Deploy on your own

    You can transfer the files to any webserver using FTP or other means, then refer to CONTRIBUTING.md for installation steps.

    🤗 Contributing

    Contributions are welcome! Feel free to open an issue or submit a pull request if you have a way to improve this project.

    Make sure your request is meaningful and you have tested the app locally before submitting a pull request.

    Refer to CONTRIBUTING.md for more details on contributing, installing requirements, and running the application.

    🙋‍♂️ Support

    💙 If you like this project, give it a ⭐ and share it with friends!

    Youtube Sponsor with Github

    ☕ Buy me a coffee


    Made with ❤️ and PHP

    Powered by Heroku

    Visit original content creator repository https://github.com/Nirzak/github-streak-stats-personal