Category: Blog

  • WinUI-ObservableSettings

    WinUI ObservableSettings

    Nuget build & test

    A C# source generator to help you generate boilerplates to read and write settings in Windows.Storage.ApplicationData.Current.LocalSettings in packaged WinUI 3 app.

    It will generate a partial class that:

    • Has strong-typed properties to read and write settings in storage
    • Implements INotifyPropertyChanged so you can bind to it in XAML
    • Raises an event when setting value changes

    Quickstart

    1. Install NickJohn.WinUI.ObservableSettings from Nuget.

    2. Say you want to store a Volume as double in storage, with the default value 0.75.

      All you need to do is adding an [ObservableSetting] attribute to the default value field:

      using NickJohn.WinUI.ObservableSettings;
      ...
      public partial class SettingsService    // Don't forget to add "partial" keyword to the class!
      {
          [ObservableSetting("Volume")]   // The "Volume" here is the key of the setting in storage
          private readonly double volume = 0.75;  // This field is used as the default setting value
      }

      It will generate a partial class:

      public partial class SettingsService : INotifyPropertyChanged
      {
          // You can bind to "Volume" in XAML
          public event PropertyChangedEventHandler? PropertyChanged;
      
          // When the setting "Volume" changes, this event will be raised
          public event EventHandler<SettingValueChangedEventArgs<double>>? VolumeChanged;
      
          // Strong typed "Volume" property to read and write setting in storage
          public double Volume 
          {
              get { ... } // Read setting from storage
              set { ... } // Write setting to storage
          }
      }
    3. Now you can use the generated class to read and write settings:

      SettingsService settingsService = new SettingsService();
      
      // Handle setting value changed events
      settingsService.VolumeChanged += (s, e) => 
      {
          Debug.WriteLine($"Volume changed from {e.OldValue} to {e.NewValue}");
      }
      
      Volume volume = settingsService.Volume; // Read settings from storage
      
      volume = volume / 2;
      
      settingsService.Volume = volume // Write settings to storage

    Details

    How does the generated class look like?

    Basically like this:

    public partial class SettingsService : INotifyPropertyChanged
    {
        private IPropertySet LocalSettings => Windows.Storage.ApplicationData.Current.LocalSettings.Values;
    
        public event PropertyChangedEventHandler? PropertyChanged;
    
        public event EventHandler<SettingValueChangedEventArgs<double>>? VolumeChanged;
            
        public double Volume
        {
            get
            {
                if (LocalSettings.TryGetValue("Volume", out object? settingObject))
                {
                    if (settingObject is double settingValue)
                    {
                        return settingValue;
                    }
                }
                return volume;
            }
            set
            {
                double oldValue = Volume;
                if (!EqualityComparer<double>.Default.Equals(oldValue, value))
                {
                    LocalSettings["Volume"] = value;
                    PropertyChanged?.Invoke(this, new PropertyChangedEventArgs("Volume"));
                    VolumeChanged?.Invoke(this, new SettingValueChangedEventArgs<double>(oldValue, value));
                }
            }
        }
    }

    Provide an explicit setting key

    • It’s highly recommended to provide an explicit settingKey to the [ObservableSetting] attribute.

      [ObservableSetting("UserEmail")]
      private readonly string userEmail = "";
    • If you don’t, the Pascal form of the attributed field name will be used (same as the generated property name).

      [ObservableSetting] // Setting key is "UserEmail"
      private readonly string userEmail = "";

      ⚠ But if you don’t provide an explicit settingKey, when you renames the attributed field, the setting key will change, and the saved setting will not be read correctly!

    How are the settings stored?

    Some types can be directly stored in Windows.Storage.ApplicationData.Current.LocalSettings.

    • If the type of the setting to save is one of these “native” setting types, it will be directly stored in storage.

    • Otherwise, it will be serialized as JSON with System.Text.Json and saved as string.

    Setting size limit

    According to the official documents:

    • Each setting key can be 255 characters in length at most.
    • Each setting can be up to 8K bytes in size.

    Acknowledgements

    This project is inspired by:

    Visit original content creator repository
  • create-hq20-dapp

    Welcome to HQ20 create-hq20-dapp. With a couple of different templates from a basic setup for smart contracts development, a react webui and an api with cache server. This is great for every new project. Contains examples of tests, coverage, documentation generators, linters, etc.

    Quick Overview

    npx create-hq20-dapp my-app
    cd my-app
    npm start

    The following templates are available:

    • smart-contracts an example of a solidity smart contracts project
    • react-webui using a create-react-app boilerplate with typescript and ethers.js connecting to a local network
    • api an api with a cache server built with express.js and postgresql database, listening and caching events.

    Usage

    You’ll need to have Node 8.16.0 or Node 10.16.0 or later version on your local development machine (but it’s not required on the server). You can use nvm (macOS/Linux) or nvm-windows to switch Node versions between different projects.

    To create a new app:

    Yarn

    yarn create hq20-dapp my-app

    yarn create <starter-kit-package> is available in Yarn 0.25+

    It will create a directory called my-app inside the current folder.
    Inside that directory, it will generate the initial project structure and install the transitive dependencies:

    my-app
    ├── README.md
    ├── node_modules
    ├── package.json
    ├── .gitignore
    ├── react-webui
    │   ├── (to complete)
    │   └── (to complete)
    ├── smart-contracts
    │   └── (to complete)
    └── api
        └── (to complete)
    

    No configuration or complicated folder structures, only the files you need to build your app.
    Once the installation is done, you can open your project folder:

    cd my-app

    Inside the newly created project, you can run some built-in commands:

    This is a step-by-step on how to get all the workspaces working, but of course, you might not want to run the android app, so, no need to install the dependencies on that workspace. Or, you might not want to start the cache server, so you can ignore steps 3, 5 and 6. That’s up to you what to run. But whatever that is, it must be it the order shown above.

    Repository updates

    This repository has automatic updates, thanks to dependabot, with an exception to react-webui template. We choose to only allow to update react-scripts and security issues, with no automatic merges because that template highly relies on CRA.

    Contributing

    Pull requests are welcome. For major changes, please open an issue first to discuss what you would like to change.

    Please make sure to update tests as appropriate.

    License

    Apache-2.0

    Credits

    Visit original content creator repository
  • django-paddle

    django-paddle

    Django models and helpers for integrating Paddle.com subscriptions with your Django app

    ⚠️This library is very much WORK IN PROGRESS, please read this document carefully to understand what is currently supported.

    Currently this package includes:

    • Django Models for plans, plan prices, subscriptions, payments (invoices)
    • Django management commands for sycing plans, subscriptions, payments
    • Webhook receivers that handle subscription creation, subscription cancellation

    Installation

    Requires:

    • Python 3.6+
    • Django 2.1.0+
    1. Install the django-paddle package
    pip install django-paddle
    
    1. Add django_paddle to your INSTALLED_APPS

    INSTALLED_APPS = [
            # ...
            'django_paddle',
            # ...
    ]
    1. In your settings.py add the following settings:

    PADDLE_VENDOR_ID = 'your-vendor-id-here'  # https://vendors.paddle.com/authentication
    PADDLE_AUTH_CODE = 'your-auth-code-here'  # https://vendors.paddle.com/authentication
    PADDLE_PUBLIC_KEY = """-----BEGIN PUBLIC KEY-----
    your
    public
    key
    here
    -----END PUBLIC KEY-----"""  # https://vendors.paddle.com/public-key
    PADDLE_ACCOUNT_MODEL = 'auth.User'

    ℹ️ If you are using the default Django User model, set PADDLE_ACCOUNT_MODEL to auth.User. If you are using a custom User model set this to something like your_custom_app.YourUserModel.

    1. In your projects main urls.py add the django_paddle URLs for receiving webhooks:

    urlpatterns = [
        path('', include('django_paddle.urls')),
    ]

    ℹ️ This will result in an absolute webhook URL https://example.com/webhook. Make sure this is the Webhook URL you set in your Paddle settings (https://vendors.paddle.com/alerts-webhooks).

    1. Run migrations

    python manage.py migrate

    The User Model specified in PADDLE_ACCOUNT_MODEL will now have a back-reference to the PaddleSubscription and vice versa.

    Example:

    sub = PaddleSubscription.objects.all()[0]
    print(sub.account)  # <User: johndoe@example.com>

    or

    user = User.objects.get(username='johndoe@example.com')
    print(u.subscriptions.all())  # <QuerySet [<PaddleSubscription: PaddleSubscription object (123456)>]>
    1. Done!

    Automatically connecting Users and Subscriptions

    We need a shared identifier between the User model and the PaddleSubscription model. This needs to be provided when we redirect a user to the Paddle checkout. If you are using the default Django User model you can provide a unique user ID as a passthrough value. The subscription_created webook will check the passtrough field and see if a User with this ID exists and automatically connect it to the newly created subscription.

    Example:

    <script src="https://cdn.paddle.com/paddle/paddle.js"></script>
    <script>
      Paddle.Setup({ vendor: your-vendor-id-here });
      var uid = "{{ request.user.id }}";  
      Paddle.Checkout.open({
        product: 'your-plan-id-here',
        passthrough: uid
      });
    </script>

    Django Management Commands

    • manage.py paddle_sync_plans – Syncs Subscription Plans
    • manage.py paddle_sync_subscriptions – Syncs Subscriptions
    • manage.py paddle_sync_payments – Syncs payments for all subscriptions

    Run tests

    python runtests.py
    

    Visit original content creator repository

  • ChangeSkin

    Build Status

    High Transparency Android Change Skin Framework

    中文README:高透明度安卓换肤框架

    Table Of Content


    Features

    toTop

    * dynamically load skin apk for skin resources, no need for apk installation

    * change skin by reset views’ attributes, no need of regenerating any views, or restarting any components

    * search skinizable attributes by matching resource type and name between app & skin package, no need of using user-defined attributes

    * support skin change of android.app.Fragment & Activity

    * support skin change of android.support.v4.app.Fragment & Activity


    Demo

    toTop

    image


    How to use

    toTop

    Import two projects by Android Studio, with names of Skin and SkinChange respectively. Project Skin is used to make skin apk, while project SkinChange is the demo app which integrates the framework.

    Better not change relative path of these two projects, to ensure demo runs.

    How to make skin apk

    toTop

    Skin package is made by project Skin.

    Skin apk contains ONLY resources, no codes. Make multiple skin apks of different skins by setting productFlavor.

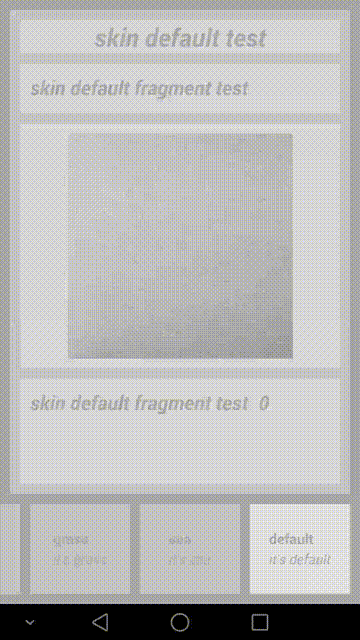
    // Skins used for demo, are DESERT (mostly orange color), GRASS(mostly green color) and SEA(mostly blue color).
    // Plus the default skin(mostly gray color), this demo contains 4 skins in total.
    productFlavors {
            desert {
    
            }
            grass {
    
            }
            sea {
    
            }
        }

    Each skin apk contains no java codes, just resources for skin change:

    task buildSkins(dependsOn: "assembleRelease") {
    
        delete fileTree(DEST_PATH) {
            include SKIN_APK_FILE_NAME_PATTERN
        }
    
        copy {
            from(FROM_PATH) {
                include SKIN_APK_FILE_NAME_PATTERN
            }
            into DEST_PATH
        }
    
    }

    In demo, this task makes 3 skin apks for 3 flavors. They are the skin packages. Their names are in the form of “skin_[SKIN_NAME]”. In demo, the gradle task makes skin_desert.apk, skin_grass.apk & skin_sea.apk. These apks are copied & pasted to the ASSET directory of the demo app. When in need of a skin change, framework loads skin apks from ASSET directory and apply them to the demo app, i.e. changing the skin.

    How to integrate skin change framework

    toTop

    Demo app corresponds to project SkinChange. It integrates the skin change framework. Please follow these steps:

    (1) Application should extend com.lilong.skinchange.base.SkinApplication:

    <application
            android:name=".base.SkinApplication"
            android:allowBackup="true"
            android:icon="@drawable/ic_launcher"
            android:label="@string/app_name"
            android:theme="@style/AppTheme">
            ....

    (2) Activity should extend com.lilong.skinchange.base.SkinActivity

    public class DemoActivity extends SkinActivity {
    ....

    (3) Fragment should extend com.lilong.skinchange.base.SkinFragment

    public class DemoFragment extends SkinFragment {
    ...

    (4) LayoutInflater needs to be acquired from getLayoutInflater() method of SkinActivity & SkinFragment. If system callbacks provide layoutInflater by params, it’s ok to use it.

    ...
    
    // when making a FragmentPagerAdapter, the layoutInflater should be acquired by the getLayoutInflater() method in SkinActivity & SkinFragment.
    skinAdapter = new SkinTestFragmentPagerAdapter(getSupportFragmentManager(), getLayoutInflater());
    ...

    How to use skin change API

    toTop

    Use changeSkin(Context context, View rootView, HashMap<String, ArrayList> map, SkinInfo info) method of SkinManager to change skin:

    ...
    private SkinManager skinManager;
    ...
    @Override
        protected void onCreate(Bundle savedInstanceState) {
            super.onCreate(savedInstanceState);
            skinManager = SkinManager.getInstance(getApplicationContext());
            ....
             skinManager.changeSkin(getApplicationContext(), getWindow().getDecorView(), getSkinizedAttributeEntries(), info);
             ....

    The second param, rootView, is the root view of the SkinActivity or SkinFragment, which needs the skin change feature. The third param, is the data structure needed by the skin change framework. This param can be acquired by getSkinizedAttributeEntries() method of SkinActivity. The fourth param, is skin apk’s info. This param can be acquired by getCurSkinInfo() method of SkinManager, as the info of the current skin.

    Tips: this API works only for the views in the viewTree under rootView. Different activities need their own calls to this API because their rootView are different. The rootView of fragment will be added to the rootView of its host activity during fragment add process, so no need for calling this API in fragment. If an activity changes its skin, all the fragments under its management will change their skins too.

    Which are the skinizable attributes

    toTop

    Theretically, all views which have user-defined id, and have attributes that use resouce references, are able to change their skin.

    If the resouce name and type of certain attribute, are the same as a resource in the skin apk, the resource value will be changed to the one in skin apk. Then this change will be applied to the view by calling the setter of this view’s attributes, via reflection.

    This is the idea of this framework.

    For example, in project SkinChange,i.e. demo app, the root layout of DemoActivity is:

    ...
    <RelativeLayout
        android:id="@+id/container"
        xmlns:android="http://schemas.android.com/apk/res/android"
        android:layout_width="match_parent"
        android:layout_height="match_parent"
        android:background="@color/background"
        >
        ...

    Its attribute “background”, referenced a resource, whose type is “color”, and name is “background”. In aforementioned skin_grass.apk, there’s also a resource with the same type and name:

    ...
    <resources>
        <color name="background">@android:color/holo_green_light</color>
        ...

    So the attribute “background” used in demo app, will get its resource value from skin apk, making a skin change.

    Currently supported skinizable views and attributes

    toTop

    Currently, the framework supports skin change of most attributes of View, TextView and ImageView. Other views and attributes can be taken into account by adding more reflection setter calls in public static void applySkinizedAttribute(View v, String attributeName, Resources skinResources, int skinResId) method of com.lilong.skinchange.utils.SkinUtil.

    Default skin

    toTop

    If no apks whose name is in the form of “skin_[SKIN_NAME].apk”, appear in the ASSET directory of project SkinChange, demo app will use its default, mostly gray-color skin. This skin has no corresponding skin apk, because it’s just the assembly of initial resource values used by attributes.


    Insight of the framework

    toTop

    ViewFactory intercepts the inflate process of layout xml files, record skinizable attributes

    toTop

    /**
     * intercept activity content view's inflating process
     * when parsing layout xml, get each view's skinizable attributes and store them for future skin change
     */
    
    public class SkinViewFactory implements LayoutInflater.Factory {
    
        private static final String TAG = "SkinViewFactory";
    
        private SkinManager skinManager;
        /**
         * factory of system LayoutInflater, if not null, execute code of this default factory first
         * see if it returns a non-null view
         * this is for android support lib, e.g. FragmentActivity, who set its own factory in onCreate()
         */
        private LayoutInflater.Factory defaultFactory;
        private LayoutInflater skinInflater;
    
        /**
         * skinized attr map of this factory's inflater's enclosing activity
         */
        private HashMap<String, ArrayList<SkinizedAttributeEntry>> skinizedAttrMapGlobal;
    
        /**
         * a temporary skinizedAttrMap for immediate skin change when completing inflating this view
         */
        private HashMap<String, ArrayList<SkinizedAttributeEntry>> skinizedAttrMapThisView;
    
        public SkinViewFactory(LayoutInflater skinInflater, LayoutInflater.Factory defaultFactory, HashMap<String, ArrayList<SkinizedAttributeEntry>> skinizedAttrMap) {
            this.skinManager = SkinManager.getInstance(skinInflater.getContext());
            this.skinInflater = skinInflater;
            this.defaultFactory = defaultFactory;
            this.skinizedAttrMapGlobal = skinizedAttrMap;
            this.skinizedAttrMapThisView = new HashMap<String, ArrayList<SkinizedAttributeEntry>>();
        }
    
        @Override
        public View onCreateView(String name, Context context, AttributeSet attrs) {
    
            View v = null;
    
            if (defaultFactory != null) {
                v = defaultFactory.onCreateView(name, context, attrs);
            }
    
            try {
    
                if (v == null) {
    
                    String fullClassName = SkinUtil.getFullClassNameFromXmlTag(context, name, attrs);
                    Log.d(TAG, "fullClassName = " + fullClassName);
    
                    v = skinInflater.createView(fullClassName, null, attrs);
                }
    
                Log.d(TAG, v.getClass().getSimpleName() + "@" + v.hashCode());
    
                ArrayList<SkinizedAttributeEntry> list = SkinUtil.generateSkinizedAttributeEntry(context, v, attrs);
                for (SkinizedAttributeEntry entry : list) {
    
                    Log.d(TAG, entry.getViewAttrName() + " = @" + entry.getResourceTypeName() + "https://github.com/" + entry.getResourceEntryName());
    
                    // use attribute type and entry name as key, to identify a skinizable attribute
                    String key = entry.getResourceTypeName() + "https://github.com/" + entry.getResourceEntryName();
    
                    skinizedAttrMapThisView.clear();
                    if (skinizedAttrMapThisView.containsKey(key)) {
                        skinizedAttrMapThisView.get(key).add(entry);
                    } else {
                        ArrayList<SkinizedAttributeEntry> l = new ArrayList<SkinizedAttributeEntry>();
                        l.add(entry);
                        skinizedAttrMapThisView.put(key, l);
                    }
    
                    // immediate skin change of this view
                    SkinUtil.changeSkin(skinInflater.getContext(), v, skinizedAttrMapThisView, skinManager.getCurSkinInfo());
    
                    // meanwhile add these skinized attr entries to the global map for future skin change
                    if (skinizedAttrMapGlobal.containsKey(key)) {
                        skinizedAttrMapGlobal.get(key).add(entry);
                    } else {
                        ArrayList<SkinizedAttributeEntry> l = new ArrayList<SkinizedAttributeEntry>();
                        l.add(entry);
                        skinizedAttrMapGlobal.put(key, l);
                    }
                }
    
            } catch (ClassNotFoundException e) {
                Log.e(TAG, Log.getStackTraceString(e));
            }
    
            return v;
        }
    
    }

    A skinizable attribute is recorded as an SkinizedAttributeEntry. One skinizable attribute of one view can be recorded as such a SkinizedAttributeEntry. The hashmap of complete attribute name : skinizable attributes, is HashMap<String, ArrayList<SkinizedAttributeEntry>>. The complete attribute name, i.e. the key of this map, is a string in the form of “[RESOURCE_TYPE]/[RESOURCE_NAME]”. The skinizable attributes, i.e. the value of this map, are all the attributes which reference such a resource, recorded by SkinViewFactory during the inflation interception. For example, there’s a TextView:

    <TextView
            android:id="@+id/tv_title"
            android:layout_width="wrap_content"
            android:layout_height="wrap_content"
            android:text="@string/tv_title_frag"
            android:textColor="@color/tv_title_frag"
            android:textSize="20sp"
            android:textStyle="bold|italic"/>

    This view leads to two keys, “string/tv_title_frag” and “color/tv_title_frag”, their corresponding value is a one-element ArrayList. “string/tv_title_frag”‘s list contains one skinizedAttributeEntry,which contains a reference to this TextView,attribute name “text”,resource type “string” and resource name “tv_title_frag”. “color/tv_title_frag”‘s list contains one skinizedAttributeEntry,which contains a refrence to this TextView,attribute name “textColor”,resource type”color” and resource name “tv_title_frag”.

    Each SkinActivity/SkinFragmentActivity owns such a skinizedAttrMap,serving as a matching dictionary between app and skin apk.

    Parse skin apk, record all the resources it contains

    toTop

    /**
         * use DexClassLoader to get all resource entries in a specified apk
         * dynamic load this apk, no need to install it
         * in this senario, "a specified apk" refers to the skin apk
         *
         * @param hostClassLoader main application's classloader
         * @param apkPath         absolute path of this specified apk
         * @return a list of all the resource entries in the specified apk
         */
        public static ArrayList<ResourceEntry> getSkinApkResourceEntries(Context context, ClassLoader hostClassLoader, String apkPath) {
    
            ArrayList<ResourceEntry> list = new ArrayList<ResourceEntry>();
    
            try {
                // odex path of the specified apk is main application's FILES dir
                DexClassLoader dexClassLoader = new DexClassLoader(apkPath, context.getFilesDir().getAbsolutePath(), null, hostClassLoader);
                String packageName = getPackageNameOfApk(context.getPackageManager(), apkPath);
    
                // get all member classes of R.java, i.e. all resource types in this package
                Class[] memberClassArray = loadMemberClasses(dexClassLoader, packageName + ".R");
                for (Class c : memberClassArray) {
                    // get all int type declared fields, i.e. all resource entries in this resource type
                    for (Field entryField : c.getDeclaredFields()) {
                        if ("int".equals(entryField.getType().getSimpleName())) {
                            ResourceEntry e = new ResourceEntry(packageName, c.getSimpleName(), entryField.getName(), entryField.getInt(null));
                            list.add(e);
                        }
                    }
                }
            } catch (Exception e) {
                Log.e(TAG, Log.getStackTraceString(e));
            }
    
            return list;
        }

    A resource is recorded as a ResourceEntry, which contains resource type, resource name, and resource id. These information is acquired by parsing R.java of skin apk via reflection. When finish parsing the resources in a skin apk, the framework returns a list of the resources this apk contains. This is a list of ResourceEntry.

    Build Resources instance of skin apk

    toTop

    /**
         * get Resources instance of a specified apk
         * this instance can be used to retrieve resource id/name/value of this apk
         *
         * @param hostResources main application's resources instance
         * @param apkPath       absolute path of the skin apk
         * @return Resources instance of the specified apk
         */
        public static Resources getApkResources(Resources hostResources, String apkPath) {
    
            try {
                AssetManager am = AssetManager.class.newInstance();
                Method methodAddAssetPath = AssetManager.class.getDeclaredMethod("addAssetPath", String.class);
                methodAddAssetPath.setAccessible(true);
                methodAddAssetPath.invoke(am, apkPath);
                Resources apkResources = new Resources(am, hostResources.getDisplayMetrics(), hostResources.getConfiguration());
                return apkResources;
            } catch (Exception e) {
                Log.e(TAG, Log.getStackTraceString(e));
            }
    
            return null;
        }

    Compare resource entries between app and skin apk, search for skinizable resources and attributes

    toTop

    /**
         * change skin using a specified skin apk
         *
         * @param rootView        rootView of android activity/fragment who is using skin change feature
         * @param skinizedAttrMap hashmap
         *                        key is a skinized attribute identifier, formed as "resource typename/resource entryname"
         *                        value is a list, contains all views that have this kind of skinized attribute
         *                        each ownership relation is a skinizedAttributeEntry
         * @param resourceEntries contains resource entries which are used to match against app's skinized attributes
         * @param fromResources   matched resource entry will get actual resource value from this resources instance
         */
        public static void changeSkinByResourceEntries(View rootView, HashMap<String, ArrayList<SkinizedAttributeEntry>> skinizedAttrMap, ArrayList<ResourceEntry> resourceEntries, Resources fromResources) {
    
            for (ResourceEntry entry : resourceEntries) {
    
                String key = entry.getTypeName() + "https://github.com/" + entry.getEntryName();
    
                if (skinizedAttrMap.containsKey(key)) {
                    ArrayList<SkinizedAttributeEntry> l = skinizedAttrMap.get(key);
                    for (SkinizedAttributeEntry e : l) {
    
                        View v = e.getViewRef().get();
                        //TODO duplicate id within the same view tree is a problem
                        // e.g. when fragment's layout has a child view with the same id as the parent view
                        if (v == null) {
                            v = rootView.findViewById(e.getViewId());
                        }
                        if (v == null) {
                            continue;
                        }
    
                        SkinUtil.applySkinizedAttribute(v, e.getViewAttrName(), fromResources, entry.getResId());
                    }
                }
            }
        }

    Traverse the resourceEntries in skin apk, compare the resource type and name against skinizable resources, i.e. the SkinizedAttributeEntry list. If there’s a match, extract the view reference and id from SkinizedAttributeEntry, thus getting the view, then fetch the resource value from skin apk. Based on the attribute name in SkinizedAttributeEntry and the aforementioned information, call the attribute setter of this view via reflection, changing the skin.

    Change skin by search result, by calling setter via reflection

    toTop

    /**
         * reset view's attribute due to skin change
         *
         * @param v             view whose attribute is to be reset due to skin change
         * @param attributeName name of the attribute
         * @param skinResources Resources instance of the skin apk
         * @param skinResId     new attribute's value's resId within Resources instance of the skin apk
         */
        public static void applySkinizedAttribute(View v, String attributeName, Resources skinResources, int skinResId) {
    
            // android.view.View
            if ("layout_width".equals(attributeName)) {
                // only workable when layout_width attribute in xml is a precise dimen
                ViewGroup.LayoutParams lp = v.getLayoutParams();
                lp.width = (int) skinResources.getDimension(skinResId);
                v.setLayoutParams(lp);
            } else if ("layout_height".equals(attributeName)) {
                // only workable when layout_height attribute in xml is a precise dimen
                ViewGroup.LayoutParams lp = v.getLayoutParams();
                lp.height = (int) skinResources.getDimension(skinResId);
                v.setLayoutParams(lp);
            } else if ("background".equals(attributeName)) {
                Drawable backgroundDrawable = skinResources.getDrawable(skinResId);
                v.setBackgroundDrawable(backgroundDrawable);
            } else if ("alpha".equals(attributeName)) {
                float alpha = skinResources.getFraction(skinResId, 1, 1);
                v.setAlpha(alpha);
            } else if ("padding".equals(attributeName)) {
                int padding = (int) skinResources.getDimension(skinResId);
                v.setPadding(padding, padding, padding, padding);
            } else if ("paddingLeft".equals(attributeName)) {
                int paddingLeft = (int) skinResources.getDimension(skinResId);
                v.setPadding(paddingLeft, v.getPaddingTop(), v.getPaddingRight(), v.getPaddingBottom());
            } else if ("paddingTop".equals(attributeName)) {
                int paddingTop = (int) skinResources.getDimension(skinResId);
                v.setPadding(v.getPaddingLeft(), paddingTop, v.getPaddingRight(), v.getPaddingBottom());
            } else if ("paddingRight".equals(attributeName)) {
                int paddingRight = (int) skinResources.getDimension(skinResId);
                v.setPadding(v.getPaddingLeft(), v.getPaddingTop(), paddingRight, v.getPaddingBottom());
            } else if ("paddingBottom".equals(attributeName)) {
                int paddingBottom = (int) skinResources.getDimension(skinResId);
                v.setPadding(v.getPaddingLeft(), v.
                ......

    Based on view, name of the skinizable attribute, Resources instance of the skin apk, resource id, the framework calls view’s setter to change attribute, thus changing skin.

    Whole process

    toTop

    /**
         * change skin using a specified skin apk
         * this apk can be a skin apk, OR this app itself(restore to default skin)
         *
         * @param rootView        rootView of android activity/fragment who is using skin change feature
         * @param skinizedAttrMap hashmap
         *                        key is a skinized attribute identifier, formed as "resource typename/resource entryname"
         *                        value is a list, contains all views that have this kind of skinized attribute
         *                        each ownership relation is a skinizedAttributeEntry
         * @param info            skinInfo which contains the target skin's information
         */
        public static void changeSkin(Context context, View rootView, HashMap<String, ArrayList<SkinizedAttributeEntry>> skinizedAttrMap, SkinInfo info) {
    
            ArrayList<ResourceEntry> resourceEntries = null;
            Resources resources = null;
    
            // restore to default skin
            if (info.isSelf()) {
                // parse R.java file of THIS APP's apk, get all attributes and their values(references) in it
                resourceEntries = SkinUtil.getThisAppResourceEntries(context);
                // resources instance from this app
                resources = context.getResources();
            }
            // change skin according to skin apk
            else {
                // parse R.java file of skin apk, get all attributes and their values(references) in it
                resourceEntries = SkinUtil.getSkinApkResourceEntries(context, context.getClassLoader(), info.getSkinApkPath());
                // get Resources instance of skin apk
                resources = SkinUtil.getApkResources(context.getResources(), info.getSkinApkPath());
            }
    
            changeSkinByResourceEntries(rootView, skinizedAttrMap, resourceEntries, resources);
        }

    toTop

    Visit original content creator repository
  • kirby-hashed-assets

    Kirby Hashed Assets

    Enhances Kirby’s css() and js() helpers to support hashed filenames. Pass your normal paths (e.g. …main.js) – the plugin will lookup hashed assets and transform the path automatically (e.g. …main.20201226.js). That way you can even keep asset paths identical in development and production environment!

    Key Features

    • 🛷 Cache bust assets without query strings
    • 🎢 No need for web server rewrite rules!
    • ⛸ Supports manifest.json
    • 🎿 Supports manually hashed file names
    • ☃️ Create preload links with hashedUrl() helper

    Projects Using the Hashed Assets Plugin

    Requirements

    • PHP 8.0+
    • Kirby 3.7+

    Installation

    Download

    Download and copy this repository to /site/plugins/kirby-hashed-assets.

    Git Submodule

    git submodule add https://github.com/johannschopplich/kirby-hashed-assets.git site/plugins/kirby-hashed-assets

    Composer

    composer require johannschopplich/kirby-hashed-assets

    Usage

    Automatic Hashing With manifest.json

    For file hashing this plugin uses the hashup npm package.

    hashup is a tiny CLI tool with two objectives in mind for your freshly build assets:

    1. Rename or rather hash (hence the name) the assets.
    2. Generate a manifest.json for them.

    You don’t even have to install it to your devDependencies, since npx will fetch it once on the fly. Add hashup to your build pipeline by adding it your package.json scripts (recommended), for example:

    {
      "scripts": {
        "clean": "rm -rf public/assets/{css,js}",
        "build": "npm run clean && <...> && npx -y hashup"
      }
    }

    Now, pass asset paths to Kirby’s asset helpers like you normally do:

    <?= js("https://github.com/johannschopplich/assets/js/main.js') ?>
    // `<script src="https://example.com/assets/js/main.9ad649fd.js"></script>

    If a corresponding hashed file is found in the manifest.json, it will be used and rendered.

    For template-specific assets, use @template (instead of @auto):

    <?= js("https://github.com/johannschopplich/@template') ?>
    // `<script src="https://example.com/assets/js/templates/home.92c6b511.js"></script>`

    Warning

    If no template file exists, https://example.com/@template will be echoed. This will lead to HTTP errors and blocked content since the requested file doesn’t exist and the error page’s HTML will be returned.

    If you are unsure if a template file exists, use the following helpers:

    • cssTpl()
    • jsTpl()

    They will echo a link tag, respectively script tag, only if a template file for current page’s template is present.

    Manual Hashing

    For smaller websites you may prefer no build chain at all, but still want to utilize some form of asset hashing. In this use-case you can rename your files manually.

    Take an imaginary main.js for example. Just include it like you normally would in one of your snippets:

    <?= js("https://github.com/johannschopplich/assets/js/main.js') ?>

    Now rename the file in the format of main.{hash}.js. You may use the current date, e.g.: main.20201226.js, which will output:

    <script src="https://github.com/johannschopplich/https://example.com/assets/js/main.20201226.js"https://github.com/johannschopplich/></script>

    Voilà, without changing the asset path the hashed file will be found and rendered in your template!

    Hashed Filenames for Preloading Links

    You can use the global hashedUrl() helper to lookup a file like you normally would with the css() or js() helpers. While the latter return a link or respectively script tag, the hashedUrl() helper will only return a URL which you can use in any context.

    <link rel="preload" href="https://github.com/johannschopplich/<?= hashedUrl("https://github.com/johannschopplich/assets/css/templates/default.css') ?>" as="style">
    // <link rel="preload" href="https://github.com/assets/css/templates/default.1732900e.css" as="style">

    Since all evergreen browsers finally support JavaScript modules natively, you may prefer preloading modules:

    <link rel="modulepreload" href="https://github.com/johannschopplich/<?= hashedUrl("https://github.com/johannschopplich/assets/js/templates/home.js') ?>">
    // <link rel="preload" href="https://github.com/assets/js/templates/home.92c6b511.js">

    License

    MIT License © 2021-PRESENT Johann Schopplich

    Visit original content creator repository

  • webform_selenium_behave_python

    Selenium Behave WebForm Test

    This project implements automation tests for the Selenium Web Form page using Behave (a BDD testing framework for Python), Selenium WebDriver and Allure Reports to create detailed performance reports.

    📝 Objective

    The goal of this project is to demonstrate how to use Behave and Selenium WebDriver to create and execute automated tests based on scenarios described in the Gherkin language.

    🚀 Technologies Used

    • Python – Programming language
    • Behave – Framework for Behavior-Driven Development (BDD)
    • Selenium WebDriver – Browser automation
    • Gherkin – Language for describing test scenarios

    📂 Project Structure

    The main code resides in the Behave step definition file, which connects the scenarios described in Gherkin files to Python code.

    📝 Step File Organization

    Here’s the information organized in a table format:

    Feature File Description of Scenarios Step File Step Definitions Purpose
    webform_actions_part_1.feature Scenarios for text, password, and textarea inputs. webform_actions_part_1.py Contains step definitions for handling input scenarios.
    webform_actions_part_2.feature Scenarios for dropdown boxes. webform_actions_part_2.py Contains step definitions for handling dropdown scenarios.
    webform_actions_part_3.feature Scenarios for file input, checkbox and radio buttons. webform_actions_part_3.py Contains step definitions for handling file input and buttons scenarios.
    webform_actions_part_4.feature Scenarios for color, date picker and range bar. webform_actions_part_4.py Contains step definitions for handling color, date picker and range bar scenarios.

    It includes three main steps:

    1. Given: Opens the web form page.
    2. When: Enters text into the input field.
    3. Then: Clicks the submit button.

    @given(u'the browser open Webform page')
    @when(u'insert a information in the text input field')
    @then(u'the submit button will be clicked')

    Example Gherkin Scenario

    An example of how a scenario can be described in Gherkin in the features/form_test.feature file:

    Feature: Test the Selenium Web Form
    
      Scenario: Fill and submit the form
        Given the browser open Webform page
        When insert a information in the text input field
        Then the submit button will be clicked

    Files project structure

    webform_selenium_behave_python/
    ├── allure-reports/             # Directory for Allure reports
    ├── features/                   # Tests and automation logic
    │   ├── pages/                  # Page Objects (Page Object Pattern)
    │   ├── steps/                  # Step definitions (separated by part)
    │   ├── *.feature               # Gherkin test scenarios
    ├── behave.ini                  # Behave configuration
    ├── requirements.txt            # Project dependencies
    ├── README.md                   # Project documentation
    

    ⚙️ Installation and Setup

    Follow these steps to set up and run the project:

    1. Clone this repository:

    git clone https://github.com/your-username/selenium-behave-webform.git
    cd selenium-behave-webform
    1. Create a virtual environment:

    python -m venv venv
    source venv/bin/activate  # Linux/Mac
    venv\Scripts\activate     # Windows
    1. Install the dependencies:
    pip install -r requirements.txt

    Make sure the requirements.txt file includes the following dependencies:

    behave
    selenium
    
    1. Install the WebDriver for your browser (e.g., ChromeDriver for Google Chrome). Ensure the driver is added to your system PATH.

    ▶️ Running the Tests

    To run the tests, use the following command:

    behave

    This will execute all scenarios described in the .feature files within the features directory.

    🗒️ Generating Allure Reports

    1. Install AlLure:
      Allure can be installed in various ways. Choose the method that best fits your environment:

    Option 1: Use the Allure Commandline

    Via Homebrew (macOS/Linux):

    brew install allure

    Via Chocolatey (Windows):
    First, install Chocolatey. Then:

    choco install allure

    Via Binary (manual):
    Download the zip file from Allure Releases.
    Extract the contents and add the binary directory to your PATH.

    1. Install Allure plugin for Python:
      Install the allure-behave package, which integrates Allure with Behave.
    pip install allure-behave
    1. Set up project for Allure
      Make sure Behave test results are generated in a format compatible with Allure:
    • Run Behave with the Allure Plugin: When running your Behave tests, include the -f allure_behave.formatter:AllureFormatter option to use the Allure format and -o allure-results to specify the output directory for the results.

    Example:

    behave -f allure_behave.formatter:AllureFormatter -o allure-results

    -f: Specifies the report format.

    -o: Specifies the output directory.

    • Final Structure: After running the tests, Allure results will be saved in a directory called allure-results.
    1. Generate HTML Report
      Once the results are generated, use the Allure Commandline to create the report:
    • Run the command to generate and view the report:
    allure serve allure-results

    This will open the report in your default browser. The report is served from a temporary local server.

    • To create a static report:
    allure generate allure-results -o allure-report
    • allure-results: Directory containing the raw test results.

    • allure-report: Directory where the HTML report will be saved.

    • To view the static report:

    allure open allure-report

    📚 Resources and References

    • Selenium Documentation
    • Behave Documentation
    • Guide to Writing Gherkin Scenarios

    🤝 Contributing

    Contributions are welcome! Follow these steps to contribute:

    1. Fork this repository.
    2. Create a branch for your changes (git checkout -b feature/new-feature).
    3. Commit your changes (git commit -m ‘Add new feature’).
    4. Push to your branch (git push origin feature/new-feature).
    5. Open a Pull Request.

    Made with ❤️ by Alisson (https://github.com/alisson-t-bucchi)
    Let me know if you need any additional modifications! 🚀

    Visit original content creator repository

  • opencl_by_example

    Welcome to OpenCL by Examples using C++.

    Why OpenCL?

    I actually started learning CUDA for GPGPU first, but since I do
    my work with a MacBook Air (late 2012 model); I quickly realized
    I couldn’t run CUDA code. My machine has an Intel HD Graphics 4000, I know, it sucks,
    but still usuable! My search on how to best make use of it led me to OpenCL.

    My interests with OpenCL is primarly motivated by my interests in Deep Learning.
    I want a better understanding of how these frameworks are making use
    of GPGPU to blaze through model training.

    Here we are now, a repo of OpenCL examples. I’ll be adding more
    examples here as I pickup more of OpenCL. I am thinking each example will
    get a bit more complex.

    Setup I am using

    1. Mac OSX
    2. OpenCL 1.2
    3. C++ 11
    4. cmake 3.7

    How to Build and Run

    1. Clone this repo and cd in this repo.
    2. Run mkdir build && cd build
    3. Run cmake .. && make

    If everything has been correctly installed, you should be able to build
    the examples with no problems. Check out the CMakeLists.txt file for info
    on how the examples are being built.

    Note, I already added the C++ header for OpenCL 1.x in the libs directory.
    However, if you are for example working with OpenCL 2 you can create your own
    header file. Head over to the KhronosGroup OpenCL-CLHPP repo
    and do the following.

    1. Run git clone https://github.com/KhronosGroup/OpenCL-CLHPP
    2. Run cd OpenCL-CLHPP
    3. Run python gen_cl_hpp.py -i input_cl2.hpp -o cl2.hpp
    4. Move the generated header file cl2.hpp into the libs directory.
    5. Profit!

    Quick Introduction and OpenCL Terminology

    You’re here so I don’t need to convince you that parallel computing is awesome
    and the future. I don’t expect you to become an expert after you’ve gone through this repo,
    but I do hope you at least get an overview of how to think in OpenCL.

    OpenCL™ (Open Computing Language) is the open,
    royalty-free standard for cross-platform,
    parallel programming of diverse processors
    found in personal computers, servers,
    mobile devices and embedded platforms. – khronos site

    The following are terms to know:

    • Platform: Vendor specific OpenCL implementation.
    • Host: The client code that is running on the CPU. Basically your application.
    • Device: The physical devices you have that support OpenCL (CPU/GPU/FPGA etc..)
    • Context: Devices you select to work together.
    • Kernel: The function that is run on the device and does the work.
    • Work Item: A unit of work that executes a kernel.
    • Work Group: A collection of work items.
    • Command Queue: The only way to tell a device what to do.
    • Buffer: A chunk of memory on the device.
    • Memory: Can be global/local/private/constant (more on this later.)
    • Compute Unit: Think of a GPU core.

    OpenCL Memory Model

    alt text

    Visit original content creator repository

  • yubikey-resident

    YubiKey Resident SSH Key Generator

    This repository provides a Docker-based tool for generating resident SSH keys using a YubiKey. Resident keys allow secure SSH authentication without needing to store the private key on disk.

    What is a Resident SSH Key?

    A resident SSH key is a key pair stored directly on a FIDO2-compatible YubiKey. Unlike traditional SSH keys, the private key never leaves the YubiKey, and only a reference to the key is needed on the host machine. This makes it more secure and convenient, especially when switching devices, as you can restore the key reference at any time.

    Features

    • Generates resident SSH keys that are stored directly on the YubiKey.
    • Automatic key regeneration (restore keys anytime using ssh-keygen -K).
    • Uses Docker to provide an isolated and repeatable environment.
    • Supports optional UID tagging for managing multiple resident keys.

    Prerequisites

    • A YubiKey 5 Series or compatible FIDO2 security key.
    • Docker and Docker Compose installed on your system.
    • OpenSSH 8.2+ (for FIDO2 SSH key support).

    Setup

    Clone this repository and navigate into the project directory:

    git clone https://github.com/your-username/yubikey-resident.git
    cd yubikey-resident

    Usage

    To generate a new resident SSH key, run:

    docker compose run --rm keygen

    This will:

    1. Prompt for an optional key comment.
    2. Display existing resident keys stored on the YubiKey.
    3. Prompt for an optional UID (to manage multiple keys).
    4. Generate a new SSH key stored directly on your YubiKey.
    5. Optionally drop you into a bash shell for further management.

    How Reference Files Are Stored

    When generating a new resident SSH key, the reference files are automatically saved into the ssh_keys/ folder (mapped to /root/.ssh in the container). These files include:

    • id_ed25519_sk – A reference file pointing to the private key stored on the YubiKey. If a UID was provided, the filename will be formatted as id_ed25519_sk_<UID>.
    • id_ed25519_sk.pub – The public key file used for SSH authentication.

    Since the actual private key never leaves the YubiKey, these reference files are simply used to interact with the key stored on the device. If deleted, they can always be regenerated using:

    ssh-keygen -K

    Restoring SSH Keys

    If you lose the reference files (id_ed25519_sk and id_ed25519_sk.pub), you can restore them using:

    ssh-keygen -K

    This will retrieve all resident keys from your YubiKey.

    Listing Stored Keys

    To check what resident keys are stored on your YubiKey, run:

    ykman fido credentials list

    This will show all stored keys, including any UIDs you assigned during key generation.

    Using SSH with Your YubiKey

    Once the key is generated and restored, you can use it for SSH authentication:

    ssh -i ~/.ssh/id_ed25519_sk user@server.com

    If a UID was used, the correct filename should be specified, e.g.:

    ssh -i ~/.ssh/id_ed25519_sk_<UID> user@server.com

    Security Considerations

    Private keys never leave the YubiKey (unlike standard SSH keys).
    No need to store sensitive key files.
    Even if your local reference file is deleted, you can restore it anytime.

    You must have access to the same YubiKey and remember your PIN to recover your resident key.

    Repository Structure

    ├── Dockerfile         # Sets up the container with OpenSSH and YubiKey Manager
    ├── docker-compose.yml # Defines the Docker service for key generation
    ├── keygen.sh          # The main script to generate resident keys
    └── README.md          # This documentation
    

    Contributing

    Feel free to open an issue or submit a pull request if you’d like to improve this project!

    License

    MIT License

    Visit original content creator repository

  • android-joke-telling-app

    Gradle for Android and Java Final Project

    ic_launcher

    In this project, you will create an app with multiple flavors that uses multiple libraries and Google Cloud Endpoints. The finished app will consist of four modules. A Java library that provides jokes, a Google Cloud Endpoints (GCE) project that serves those jokes, an Android Library containing an activity for displaying jokes, and an Android app that fetches jokes from the GCE module and passes them to the Android Library for display.

    Why this Project

    As Android projects grow in complexity, it becomes necessary to customize the behavior of the Gradle build tool, allowing automation of repetitive tasks. Particularly, factoring functionality into libraries and creating product flavors allow for much bigger projects with minimal added complexity.

    What Will I Learn?

    You will learn the role of Gradle in building Android Apps and how to use Gradle to manage apps of increasing complexity. You’ll learn to:

    • Add free and paid flavors to an app, and set up your build to share code between them
    • Factor reusable functionality into a Java library
    • Factor reusable Android functionality into an Android library
    • Configure a multi project build to compile your libraries and app
    • Use the Gradle App Engine plugin to deploy a backend
    • Configure an integration test suite that runs against the local App Engine development server

    Video

    I’ve created a video demonstrating the app. Click here to view the video on YouTube.

    Screenshots

    joke_01_main joke_02_ad joke_03_marriage joke_04_main_paid joke_05_family

    Image Resources

    Math made by Prosymbols from www.flaticon.com is licensed by CC 3.0 BY. Dog made by Freepik from www.flaticon.com is licensed by CC 3.0 BY. Couple made by Freepik from www.flaticon.com is licensed by CC 3.0 BY. Development made by Prosymbols from www.flaticon.com is licensed by CC 3.0 BY. Family made by Freepik from www.flaticon.com is licensed by CC 3.0 BY. Wink made by Smashicons from www.flaticon.com is licensed by CC 3.0 BY.

    Library

    How Do I Complete this Project?

    Step 0: Starting Point

    This is the starting point for the final project, which is provided to you in the course repository. It contains an activity with a banner ad and a button that purports to tell a joke, but actually just complains. The banner ad was set up following the instructions here:

    https://developers.google.com/mobile-ads-sdk/docs/admob/android/quick-start

    You may need to download the Google Repository from the Extras section of the Android SDK Manager.

    You will also notice a folder called backend in the starter code. It will be used in step 3 below, and you do not need to worry about it for now.

    When you can build an deploy this starter code to an emulator, you’re ready to move on.

    Step 1: Create a Java library

    Your first task is to create a Java library that provides jokes. Create a new Gradle Java project either using the Android Studio wizard, or by hand. Then introduce a project dependency between your app and the new Java Library. If you need review, check out demo 4.01 from the course code.

    Make the button display a toast showing a joke retrieved from your Java joke telling library.

    Step 2: Create an Android Library

    Create an Android Library containing an Activity that will display a joke passed to it as an intent extra. Wire up project dependencies so that the button can now pass the joke from the Java Library to the Android Library.

    For review on how to create an Android library, check out demo 4.03. For a refresher on intent extras, check out;

    http://developer.android.com/guide/components/intents-filters.html

    Step 3: Setup GCE

    This next task will be pretty tricky. Instead of pulling jokes directly from our Java library, we’ll set up a Google Cloud Endpoints development server, and pull our jokes from there. The starter code already includes the GCE module in the folder called backend.

    Before going ahead you will need to be able to run a local instance of the GCE server. In order to do that you will have to install the Cloud SDK:

    https://cloud.google.com/sdk/docs/

    Once installed, you will need to follow the instructions in the Setup Cloud SDK section at:

    https://cloud.google.com/endpoints/docs/frameworks/java/migrating-android

    Note: You do not need to follow the rest of steps in the migration guide, only the Setup Cloud SDK.

    Start or stop your local server by using the gradle tasks as shown in the following screenshot:

    Once your local GCE server is started you should see the following at localhost:8080

    Now you are ready to continue!

    Introduce a project dependency between your Java library and your GCE module, and modify the GCE starter code to pull jokes from your Java library. Create an AsyncTask to retrieve jokes using the template included int these instructions. Make the button kick off a task to retrieve a joke, then launch the activity from your Android Library to display it.

    Step 4: Add Functional Tests

    Add code to test that your Async task successfully retrieves a non-empty string. For a refresher on setting up Android tests, check out demo 4.09.

    Step 5: Add a Paid Flavor

    Add free and paid product flavors to your app. Remove the ad (and any dependencies you can) from the paid flavor.

    Optional Tasks

    For extra practice to make your project stand out, complete the following tasks.

    Add Interstitial Ad

    Follow these instructions to add an interstitial ad to the free version. Display the ad after the user hits the button, but before the joke is shown.

    https://developers.google.com/mobile-ads-sdk/docs/admob/android/interstitial

    Add Loading Indicator

    Add a loading indicator that is shown while the joke is being retrieved and disappears when the joke is ready. The following tutorial is a good place to start:

    http://www.tutorialspoint.com/android/android_loading_spinner.htm

    Configure Test Task

    To tie it all together, create a Gradle task that:

    1. Launches the GCE local development server
    2. Runs all tests
    3. Shuts the server down again

    Rubric

    Required Components

    • Project contains a Java library for supplying jokes
    • Project contains an Android library with an activity that displays jokes passed to it as intent extras.
    • Project contains a Google Cloud Endpoints module that supplies jokes from the Java library. Project loads jokes from GCE module via an async task.
    • Project contains connected tests to verify that the async task is indeed loading jokes.
    • Project contains paid/free flavors. The paid flavor has no ads, and no unnecessary dependencies.

    Required Behavior

    • App retrieves jokes from Google Cloud Endpoints module and displays them via an Activity from the Android Library.

    Optional Components

    Once you have a functioning project, consider adding more features to test your Gradle and Android skills. Here are a few suggestions:

    • Make the free app variant display interstitial ads between the main activity and the joke-displaying activity.
    • Have the app display a loading indicator while the joke is being fetched from the server.
    • Write a Gradle task that starts the GCE dev server, runs all the Android tests, and shuts down the dev server.

    License

    Apache, see the LICENSE file.

    Visit original content creator repository
  • github-commit-watcher

    Build Status

    Official documentation here.

    gicowa.py – GitHub Commit Watcher

    GitHub’s Watch feature doesn’t send notifications when commits are pushed.
    This script aims to implement this feature and much more.

    Call for maintainers: I don’t use this project myself anymore but IFTTT
    instead (see below). If you’re interested in taking over the maintenance of
    this project, or just helping, please let me know (e.g. by opening an issue).

    Installation

    $ sudo apt-get install sendmail
    $ sudo pip install gicowa
    

    Quick setup

    Add the following line to your /etc/crontab:

    0 * * * * root gicowa --persist --no-color --mailto myself@mydomain.com lastwatchedcommits MyGitHubUsername sincelast > /tmp/gicowa 2>&1
    

    That’s it. As long as your machine is running you’ll get e-mails when something gets pushed on a repo you’re watching.

    NOTES:

    • The e-mails are likely to be considered as spam until you mark one as
      non-spam in your e-mail client. Or use the --mailfrom option.
    • If you’re watching 15 repos or more, you probably want to use the
      --credentials option to make sure you don’t hit the GitHub API rate limit.

    Other/Advanced usage

    gicowa is a generic command-line tool with which you can make much more that
    just implementing the use case depicted in the introduction. This section
    shows what it can.

    List repos watched by a user

    $ gicowa watchlist AurelienLourot
    watchlist AurelienLourot
    brandon-rhodes/uncommitted
    AurelienLourot/crouton-emacs-conf
    brillout/FasterWeb
    AurelienLourot/github-commit-watcher
    

    List last commits on a repo

    $ gicowa lastrepocommits AurelienLourot/github-commit-watcher since 2015 07 05 09 12 00
    lastrepocommits AurelienLourot/github-commit-watcher since 2015-07-05 09:12:00
    Last commit pushed on 2015-07-05 10:48:58
    Committed on 2015-07-05 10:46:27 - Aurelien Lourot - Minor cleanup.
    Committed on 2015-07-05 09:39:01 - Aurelien Lourot - watchlist command implemented.
    Committed on 2015-07-05 09:12:00 - Aurelien Lourot - argparse added.
    

    NOTES:

    • Keep in mind that a commit’s committer timestamp isn’t the time at
      which it gets pushed.
    • The lines starting with Committed on list commits on the master
      branch only. Their timestamps are the committer timestamps.
    • The line starting with Last commit pushed on shows the time at which a
      commit got pushed on the repository for the last time on any branch.

    List last commits on repos watched by a user

    $ gicowa lastwatchedcommits AurelienLourot since 2015 07 04 00 00 00
    lastwatchedcommits AurelienLourot since 2015-07-04 00:00:00
    AurelienLourot/crouton-emacs-conf - Last commit pushed on 2015-07-04 17:10:18
    AurelienLourot/crouton-emacs-conf - Committed on 2015-07-04 17:08:48 - Aurelien Lourot - Support for Del key.
    brillout/FasterWeb - Last commit pushed on 2015-07-04 16:40:54
    brillout/FasterWeb - Committed on 2015-07-04 16:38:55 - brillout - add README
    AurelienLourot/github-commit-watcher - Last commit pushed on 2015-07-05 10:48:58
    AurelienLourot/github-commit-watcher - Committed on 2015-07-05 10:46:27 - Aurelien Lourot - Minor cleanup.
    AurelienLourot/github-commit-watcher - Committed on 2015-07-05 09:39:01 - Aurelien Lourot - watchlist command implemented.
    AurelienLourot/github-commit-watcher - Committed on 2015-07-05 09:12:00 - Aurelien Lourot - argparse added.
    AurelienLourot/github-commit-watcher - Committed on 2015-07-05 09:07:14 - AurelienLourot - Initial commit
    

    NOTE: if you’re watching 15 repos or more, you probably want to use the
    --credentials option to make sure you don’t hit the GitHub API rate limit.

    List last commits since last run

    Any listing command taking a since <timestamp> argument takes also a
    sincelast one. It will then use the time where that same command has been
    run for the last time on that machine with the option --persist. This option
    makes gicowa remember the last execution time of each command in
    ~/.gicowa.

    $ gicowa --persist lastwatchedcommits AurelienLourot sincelast
    lastwatchedcommits AurelienLourot since 2015-07-05 20:17:46
    $ gicowa --persist lastwatchedcommits AurelienLourot sincelast
    lastwatchedcommits AurelienLourot since 2015-07-05 20:25:33
    

    Send output by e-mail

    You can send the output of any command to yourself by e-mail:

    $ gicowa --no-color --mailto myself@mydomain.com lastwatchedcommits AurelienLourot since 2015 07 04 00 00 00
    lastwatchedcommits AurelienLourot since 2015-07-04 00:00:00
    AurelienLourot/crouton-emacs-conf - Last commit pushed on 2015-07-04 17:10:18
    AurelienLourot/crouton-emacs-conf - Committed on 2015-07-04 17:08:48 - Aurelien Lourot - Support for Del key.
    brillout/FasterWeb - Last commit pushed on 2015-07-04 16:40:54
    brillout/FasterWeb - Committed on 2015-07-04 16:38:55 - brillout - add README
    AurelienLourot/github-commit-watcher - Last commit pushed on 2015-07-05 10:48:58
    AurelienLourot/github-commit-watcher - Committed on 2015-07-05 10:46:27 - Aurelien Lourot - Minor cleanup.
    AurelienLourot/github-commit-watcher - Committed on 2015-07-05 09:39:01 - Aurelien Lourot - watchlist command implemented.
    AurelienLourot/github-commit-watcher - Committed on 2015-07-05 09:12:00 - Aurelien Lourot - argparse added.
    AurelienLourot/github-commit-watcher - Committed on 2015-07-05 09:07:14 - AurelienLourot - Initial commit
    Sent by e-mail to myself@mydomain.com
    

    NOTES:

    • You probably want to use --no-color because your e-mail client is
      likely not to render the bash color escape sequences properly.
    • The e-mails are likely to be considered as spam until you mark one as
      non-spam in your e-mail client. Or use the --mailfrom option.

    Changelog

    1.2.3 (2015-10-17) to 1.2.5 (2015-10-19):

    • Exception on non-ASCII characters fixed.

    1.2.2 (2015-10-12):

    • Machine name appended to e-mail content.

    1.2.1 (2015-08-20):

    • Documentation improved.

    1.2.0 (2015-08-20):

    • --version option implemented.

    1.1.0 (2015-08-20):

    • --errorto option implemented.

    1.0.1 (2015-08-18) to 1.0.9 (2015-08-19):

    • Documentation improved.

    Contributors

    Similar projects

    The following projects provide similar functionalities:

    • IFTTT, see this post.
    • Zapier, however you have to create a “Zap” for each single project you want to watch. See this thread.
    • HubNotify, however you will be notified only for new tags, not new commits.

    Visit original content creator repository